How to Use Trekking Poles (or Sticks): And Choose Them
Trekking poles will save your life! That’s an extreme claim, let’s bring it down a notch. Good trekking poles will save your knees, your back and ankles from a lot of pain!
And that’s the truth. The best trekking poles are robust, adjustable and lightweight. Using them takes a huge amount of pressure off your joints. They also help reduce the risk of arthritis further along the line of your life (maybe they should go into our list of carry-in essentials…)
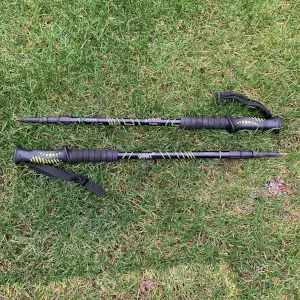
I have a secret that I want to share with you: my trekking poles are over 5 years old and cost me very little. And they are stilling going strong. A low price tag doesn’t mean short lifespan for you poles.
What I will say is, compared to some of the big names in pole manufacturing, they are pretty heavy. But that’s a bonus – I have well-defined deltoids (that’s the vanity muscle kicking in).
Enough about me, let’s look at how to choose trekking poles and use them the right way.
How to choose trekking poles
There is small calculation to make, but it’s not rocket science!
First, know your build/bodyframe size or type. Small, medium or large.
Now factor in the type of terrain/activity you’ll be covering. I’ve broken this down into three categories:
- Ultralight hiking
- Hillwalking (see our guide to hillwalking essentials for more tips and advice)
- Arduous/rugged terrain.
Browse for poles that match the outputs.
But that’s a lot of work, so I’ve compiled a list of the best trekking poles. Each represents either the best available at the time of writing, or my own personal thoughts.
Before we move on to the actual poles, here are a few other thoughts…
Other Considerations when choosing trekking poles
Your preferences will not the be same as mine. Choosing the right poles for your trek is a simple task, but you need to consider these points:
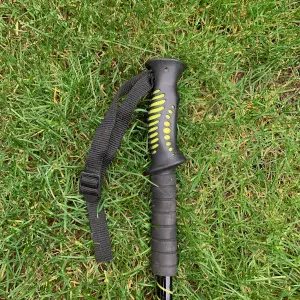
Wrist Straps
Wrist straps are one of the most debated topics. Some people will cut the straps off their poles. Others prefer to have them adjusted tight to prevent losing them.
If you don’t need or want straps don’t buy poles with straps!
For everyone else, think about the following points:
- Are the straps adjustable?
- What material are the pole straps made from? Leather is more comfortable, synthetic straps last longer.
- Where are the straps fitted to the pole? Some hiking poles have straps mounted in the handgrip, others further down the shaft.
- Can you adjust them when wearing gloves? This is important for cold-weather hiking and trekking.
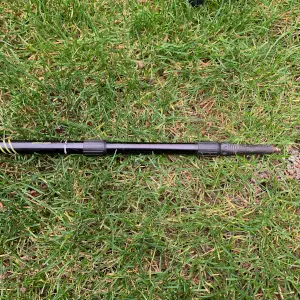
Adjustable vs Fixed-Height Trekking Poles
Do you want, or need, to adjust your poles? I’ve used both types and prefer adjustable trekking poles. They allow me to change the length to best fit the terrain I’m in hiking in.
Adjustable trekking poles are collapsible and stored with ease when not needed.
On the flip-side, fixed-height poles tend to be stronger as they have no weak points.
If you’re still growing adjustable poles are the best choice for you. Unless you have the money to buy regular replacements. Oh, if you’re shrinking – get adjustables (we all get older and shorter).
Strap Mounting
Some poles have wriststraps fitted to the handles. Others, like many fixed-height poles, have straps mounted further down the shaft.
I haven’t seen adjustable poles with straps mounted anywhere but on the handle. For everyone else, you have a choice.
Carbon vs Aluminum Trekking Poles
There is a furious debate around this question. So here’s a personal view: I use aluminium poles.
Here’s why: Carbon poles can snap with ease if they bend too far. I’ve broken two poles this way (an expensive mistake).
What’s The Correct Height For Your Poles?
When you hold the handgrip, your forearms should be at 90 degrees to the ground. This is only advice and you should feel free to pick a pole height that you’re comfortable with.
But bear in mind that the above recommendation is the tried, tested and preference of many hikers. And Nordic walkers.
Having your forearm in this position gives you the most leverage and power. In particular when walking over difficult terrain.
Adjusting Your Trekking Poles
If you’ve asked this question I’ll assume you’ve bought collapsible poles. Otherwise, you’ll need a hacksaw which is not a great idea if your poles were expensive.
Most extendable poles have two locks.

How Do you Use Trekking Poles
Watch a mass of elderly people move at a blistering pace as they surge forward with Nordic poles.
It’s a distburbing sight, but this is pretty much how you use trekking poles.
The idea is to mimic the movements of a cross-coutnry skier. As your left leg swings forward so should the pole in your right hand.
As your foot strikes the ground, dig in the tip of the pole and push back using your arms. Don’t worry, it’s easier than it sounds and you won’t look like you’re staggering down the road. Well, not after a few hours of practise.
When going uphill, or over rugged ground, you should ‘double pole’ with every step. I’ll explain.
Keep the poles behind your heels. Every step you take, press both pole tips into the ground and drive yourself forward. Like skiers do.
One vital note for anyone using adjustbale poles: tighten the locking mechanis are far as you can. Nothing irritates you more than having to stop every 10 minutes to adjust the pole length.
Moving downhill requires you to reverse the process. Place your poles in front of you and take a step down. Don’t extend your foot past the poles and, as you move forward, let the poles take some of your bodyweight.
Is It Better to Hike With One or Two Poles
Two. Always two.
Some hikers will tell you they’ve trekked multi-day expeditions with only one pole. And that’s fine for them. For me, it’s a risk.
Here are a few thoughts for you to think over before you make your decision.
What happens if your one and only pole breaks? Will you be able to get a replacement when you’re deep in the mountains, or trekking through deep dark woods?
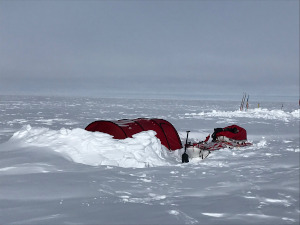
Poles make great replacement tent poles. I’ve been in a life or death situation in which violent storms destroyed my tent poles. My ski poles saved the day for a time. Trekking poles can also be used to rig up an emeregency hiking shelter.
Using two poles spreads load. Using one pole causes you to place more weight onto one side of your body as you move. This unnatural motion leads to aches and pains that last for hours, or days, after.
Conclusion: Choose The Very Best Trekking Poles You Can Afford
Only have enough spare cash to buy cheap, heavy poles? That’s fine as long as they can survive hard knocks and scrapes. As I said earlier, my training poles cost me £19.99 (about $25) and they are still going strong.


