How To Choose An Emergency Hiking Shelter
The headline is a little provocative, but I have an admission to make. On two occasions I’ve come close to death whilst hiking or trekking, the second time was within a hair’s breadth. The reasons why are numerous, but the most obvious failure was not learning from my first mistake. The second was not having an emergency hiking shelter to hand!
Some of what I’m going to discuss today is already covered in the hiking and hillwalking essentials post. Rather than rehash the points already covered, we’ll be exploring some of the considerations when choosing an emergency shelters for hikers and anyone else who ventures out into the wilds.
Looking for the best two person tent? Try these.
This list isn’t exhaustive – every year the outdoor gear marketplace sees an influx of new ideas, good and bad. We’re going to look at the essentials.
First, a story…
My Brushes with the Grim Reaper
When I was in my early 20’s I volunteered for a survival course run at multinational military training centre in Germany. Key to passing the course was learning how to survive. Should be easy, right?
I thought the same.
The year I attended had been ridiculously warm and three weeks on the run, living off the land, would be a breeze. For the first week all of the attendees were introduced to survival skills, including how to make essentials items needed by soldiers on the run. This included sleeping bags and an emergency shelter.
That last phrase seems obvious to most people, but at the time it didn’t to me. I used parachute silk and a fleece blanket I found (by that I mean, went against the rules and drove to town to buy instead of playing the game) to craft a lightweight sleeping bag.
My emergency shelter was nothing more than two large strips of para silk stitched together and with cords attached to each corner. The latter would be used to tie the shelter to trees and poles.
The course progressed. All my classmates were officially ‘captured’ and interrogated for a short time, then set loose. Before releasing this band of feral soldiers, our captors repatriated us with our makeshift survival gear.
It’s round about there that everything went wrong!
Everyone on the course was turned out into the German countryside. Our mission was to navigate to a pickup point from which we would be returned back to our units. After a ‘little roughing up’.
None of this worried me. I’d applied for the course for some very specific reasons, the least of which being a primer for another course I planned to attend and pass. It was at this point that Mother Nature decided to have a moment and immerse the balmy summer heat in a vat of icy agony!
I don’t think I mentioned the rain that came before the cold…
My poorly made emergency shelter proved to be useless. My cunning plan to build a lightweight sleeping bag had failed. My body was chilled.
For the next couple of days, I experienced swings of pain: The extremities of my body were ravaged by night-time frosts and rapidly warmed by the midday sun.
The night my body failed was vicious. Temperatures smashed through the base of the thermometer and levelled out at minus 18 Celsius! At that worst of moments, I’d been wading through a river, trying to escape a team from the hunter force.
Sometime later I woke up in hospital.
All is well though. Well, apart from the weeks of agony that followed as my feet and hands recovered from mild frostbite.
This one lesson taught me the value of planning for as many eventualities as possible. My emergency shelter should have been designed with emergencies in mind and not as a half-measure that considered only the weight I didn’t want to carry.
Time has moved on. That event took place over 20 years ago. More recently I ran into a similar situation in during my Greenland crossing, but this time the gods were furious, and it was a close call.
Rather than recount this story again, I’ll let you browse at your own convenience.
Let’s talk emergencies, hiking and shelters…
The (Semi-Awesome) Emergency Hiking Shelter Guide
Choosing an emergency hiking shelter is easy – go to your local outdoor gear shop, glance over the offerings and take your pick. Sorted.
The reality is very different. Here’s a list of considerations to pay heed to before parting with you cash.
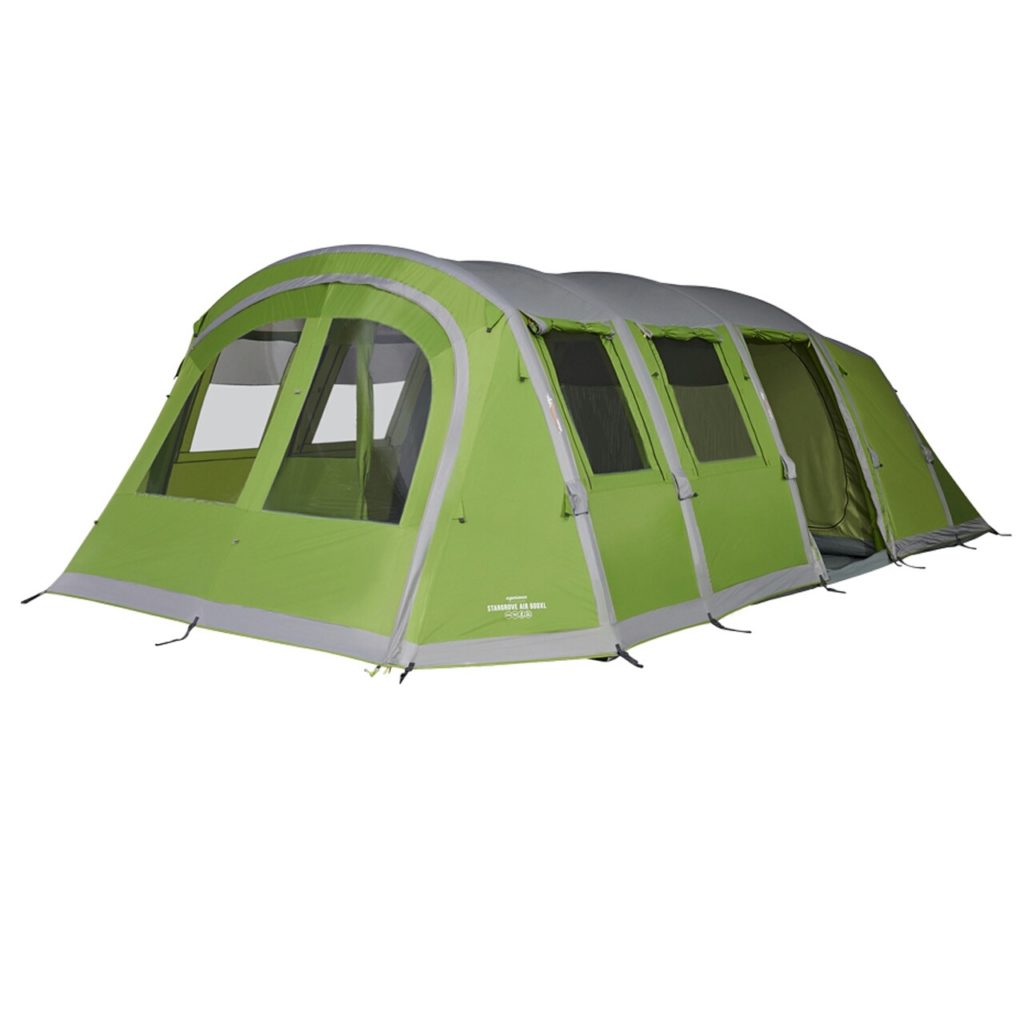
Types of Emergency Shelter
Before we hurl ourselves headfirst into the what’s and whys of emergency shelters, let pause for a moment and look at the types of shelters available to hikers.
Three options exist:
Bivy bag, or bivouac sack.
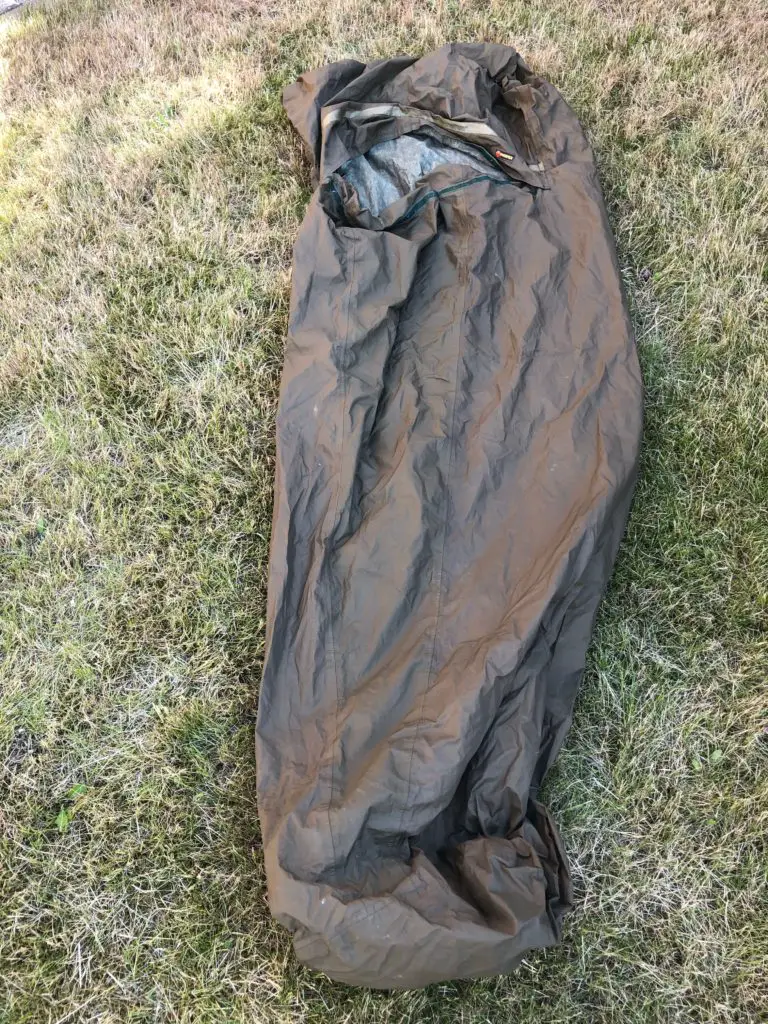
This type of shelter is pretty much as basic as it comes. Bivy bags, were originally made for backpackers who needed to carry a really lightweight emergency shelter. They’re designed to protect one person from the elements. Generally, bivy bags are waterproof which makes them perfect for keeping your sleeping bag dry.
Most haven’t been designed to be spacious and some of you might not like the sense of confinement.
Tarp.
Derived from the word ‘tarpaulin’, this type of shelter is little more than a sheet of material. Most tarps are waterproof but do little to keep you warm.The main benefit of a tarp is the amount of working space available – something you don’t have with wrapped in a bivy bag.
A tarp is larger than a bivy bag and, usually, heavier.
Super Lightweight Bothy.
A bothy is a Scottish name for one of the small huts, or cottages, that dot the beautiful moorlands. Bothy’s have been the go-to destinations for many hikers and hill walkers trekking the wilds of Scotland, in much the same way as Norwegians use the DNT system.
A super lightweight bothy is nothing more than the kind of shelter Conrad makes, although some models do have an internal frame.
Where Are You Planning to Hike (or Trek, or Ski)?
Different destinations will place different demands on the gear you choose. Just as you wouldn’t (hopefully) attempt to summit Everest in a pair of Merrell Moab 2 boots, you’d be misguided if you believed a shelter designs for the tropics would be a good fit for Greenland!
Don’t get me wrong, Moab’s are awesome walking boots (my pair are one of the best purchases I’ve ever made), but I’ve experienced frostbitten feet and have no desire to ever again experience that pain.
Likewise, your emergency shelter needs to be matched to the environment through which you’ll be travelling.
Two key considerations to think about:
Temperature
A lightweight shelter is going to be useless if you’re mountaineering or travelling through polar regions.
If at all possible buy a shelter that has an insulated floor, or buy a pad to place underneath you.
Storm Rating
There’s a reason why Hilleberg tents can take pretty much anything nature decides to unleash – they’re made of high quality, durable materials. Top of the range products like the Black Label tents are constructed using 1800 gm nylon. If you’re not quite sure what that means, think of it as being your own fortress against the elements.
An emergency shelter must be able to withstand extremes of weather.
Can You Double Up the Usage of Your Shelter?
A few years back I was training with the legend that is Conrad Dickinson (full distance ski to the South Pole, kite ski back out… with his wife as his teammate!). One of the pieces of gear he showed me was a parachute silk windbreak he used as a highly portable ‘office’.
Balloon-shaped, the shelter packed into the pocket of his shell jacket[jr3] . When unrolled it provided enough space for two people to sit inside and carry out basic admin tasks: map reading, food break, blister prevention, etc.
With a little thinking and some deft work with a sewing machine, Conrad had removed the need to erect a tent solely for admin purposes.
The beauty of parachute silk is the windproof qualities of the material. And, when layered into a suit, it keeps you very warm. The suit below is over 25 years old, has seen some action and is still going strong.
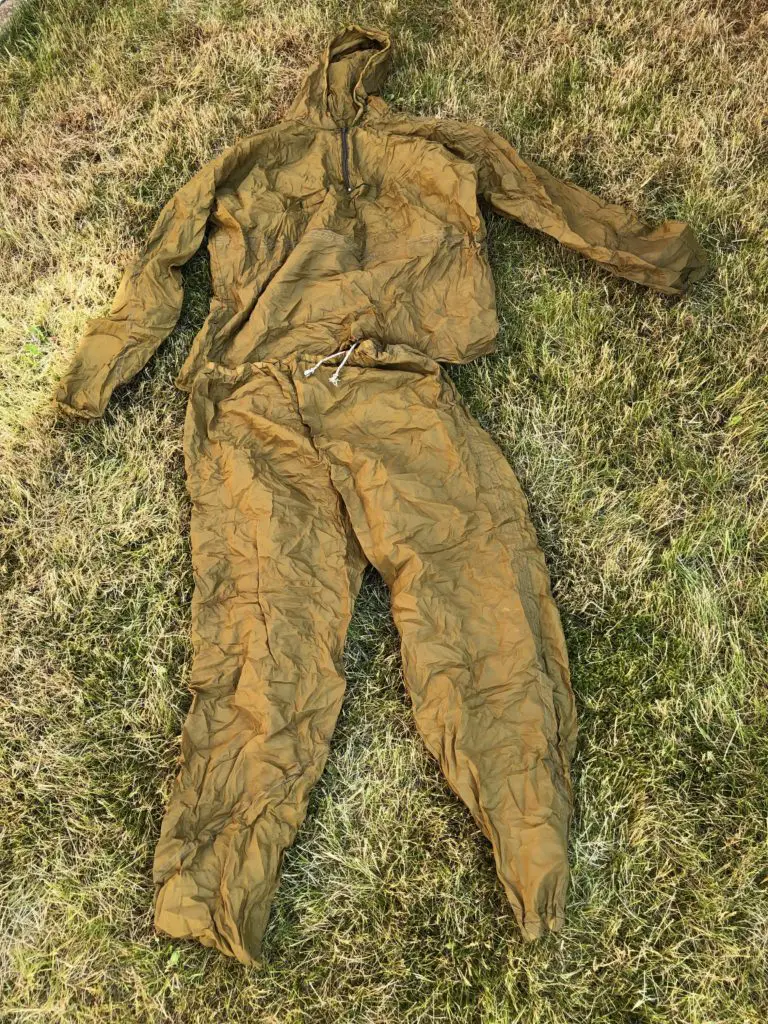
Conrad’s shelter had two functions: an emergency shelter and a place to carry out admin.
Don’t Cut Corners on Quality
Really, don’t! The worst mistake ever made was relying on a piece of sub-standard gear. Your life is worth much more than a few pennies saved.
Some of the top-end survival shelters will cost you an arm and a leg (which is a metaphor and a damned sight more attractive than losing limbs, or digits, to frostbite). If you can’t afford to buy what you need, then borrow.
As an alternative, you could design an emergency shelter that meets your specifications. Conrad’s example above was a classic case of design work that met both the primary need – staying alive – whilst also serving as a portable admin area on his expeditions. And no corners were cut during the manufacturing process.
Only the highest quality silk was used. The construction is double-skinned and double-stitched to give an incredibly durable emergency shelter.
I Once Caught An Emergency Hiking Shelter This Big!
Many men have an obsession about size: biggest biceps, biggest fish… and so on. Most of the time this ‘bigness’ is irrelevant (to a few men and most women), but today that changes!
Your emergency shelter needs to be large enough to accommodate you, vital gear and at least one person.
Solo hiking is my preferred option. From time to time one of my friends will join me and during the planning phase we take the teams size into consideration. Having a shelter capable of covering the entire a small group of trekkers has a number of advantages:
- Communicating is easier that having to shout into a storm.
- Shared body heat warms the shelter faster and keeps it warm.
- Tasks can be shared e.g. one person makes a hot drink whilst the other sends emergency communications.
- Having the team all in one place brings peace of mind – one less factor to worry about.
- Rescue teams have one reference point to search, not many.
- More…
How Small Can You Pack the Emergency Shelter?
Sometimes smaller is better! This goes against my earlier comments about size, but bear with me.
I have a couple of shelters of varying sizes. The smallest fits in my pocket, the largest takes up the top pouch of my daysack, which is still pretty small. Perfect for a solo journey.
Carrying an emergency shelter that takes up the same space as your tent is insane!
How Many Failure Points Does Your Emergency Shelter Have?
One of the most important questions you need to ask is one of complexity. The more moving parts in your shelter the more likely one of them will fail. I’ve never felt the need to use a shelter with a supporting frame. The extra weight and potential for broken poles put me off buying models such as the super lightweight bothy.
Having used these types of shelter on a number of occasions I’d recommend keeping your choice as simple as possible.
What Happens If You Don’t Have A Shelter?
First, don’t panic! A refuse sack – the large black bags carried by considerate hikers and campers – serves as a great alternative. Yes, you’ll sweat but at least you’ll survive.
If you don’t have a plastic bag, and depending on where you’re travelling, you could build your own shelter. Here are a couple of options:
Snow Hole or Shelter
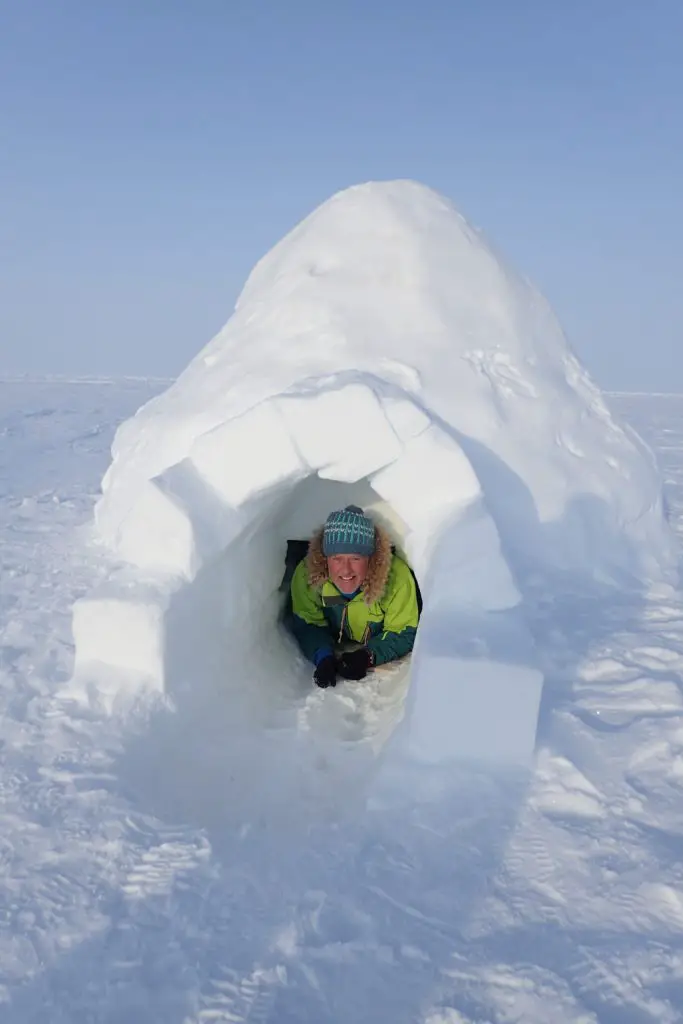
If you’re travelling through snowy regions dig a snowhole. Not only will the hole protect you from the worst of the elements, it’s also incredibly warm inside. The key here is not to simply dig down into the snow.
Instead heap snow into a mound and then dig into it from the side in the lee of the wind i.e. the entrance facing away from the prevailing wind. The ‘front door’ of your shelter should be dug at ground level.
Lean To Shelter
A lean-to, like a tarp, is the most basic form of shelter available. You’ll need to construct the lean-to from whatever you can find. To make life easy, Mother Nature has scattered the countryside with all manner of materials that are ideal for the build.
The most obvious form of lean-to is the traditional ‘survivalist’ type structure long featured in magazines such as ‘The Survivalist’ (ah, sweet memories!) The key to building a weather resistant emergency shelter is positioning: build the rear wall facing the prevailing wind.
Conclusion: Never Go Hiking Without An Emergency Shelter
Which goes without saying, but there is a tendency amongst many hikers and hill walkers to ditch the emergency shelter. The thought process being that less weight is better. I’ve been guilty of this, but never again. In terms of weight and cost, an emergency hiking shelter is small price to pay and will ensure you don’t pay the ultimate price.
Amazon are worth checking out for a huge selection of hiking shelters under one roof.