Breaking in Your Hiking Boots
Learn how to break in hiking boots, fast or slow, and avoid the misery of blisters and foot injuries
It’s one of the biggest questions hikers ask, and for good reason. Learning how to break in hiking boots is a key skill that will save you from pain, aggravation and irritation. There are plenty of ways to break in boots, and shoes, but some of the tips on the web are, at best, suspect. I mean, who was ever convinced that urinating on your footwear makes for a more comfortable hike (we’ll cover that ‘advice’ later)?
Brief interlude: this post is part of our guide to hiking boots.
- Learn how to break in hiking boots, fast or slow, and avoid the misery of blisters and foot injuries
- Breaking in new hiking boots does not have to hurt
- Understanding how a hiking boot should fit
- Simple ways to protect your feet during the breaking-in process
- Synthetic vs leather: which is faster to break in?
- Can you break in hiking boots fast?
- Dealing with hiking injuries to the feet
- We hope this post addresses the question(s) of how to break in hiking boots. What do you think?
Jake and I both have a huge amount of experience in this area. Between us, we’ve racked up over 50 years of hiking. We’ve suffered burns, blisters, broken parts of our bodies, so we’ve got a lot to say about what works, and what doesn’t.
We’ve also worked out, between us, that over the years we’ve hiked our way through at least 25 pairs of shoes and boots!
Breaking in new hiking boots does not have to hurt
In this post, we’ll walk you through the stages of the process and include other thoughts to consider, such as how your boot fits around your feet. Here’s a high-level view of the process:
- Understanding how a hiking boot should fit
- Simple ways to protect your feet during the break-in process
- Synthetic vs leather: which is easier to soften?
- Dealing with blisters
- Final thoughts
Before we move on I have only one comment to add: there is no super-fast way to break in your boots. The steps take time and patience. Many of the shortcuts to slipper-like hiking footwear are no more than myths and pseudo-hiking magic aka lies, damned lies and more lies.
Understanding how a hiking boot should fit
The fit of your boots is vital to understand. For the best fitting, you should go to your local outdoor store and ask an expert to help size them to your feet. But, as a seasoned hiker, I find it useful to have some advanced knowledge.
Here’s a quick rundown of the considerations you’ll need to make:
- Toe-box size
- Drop
- Width
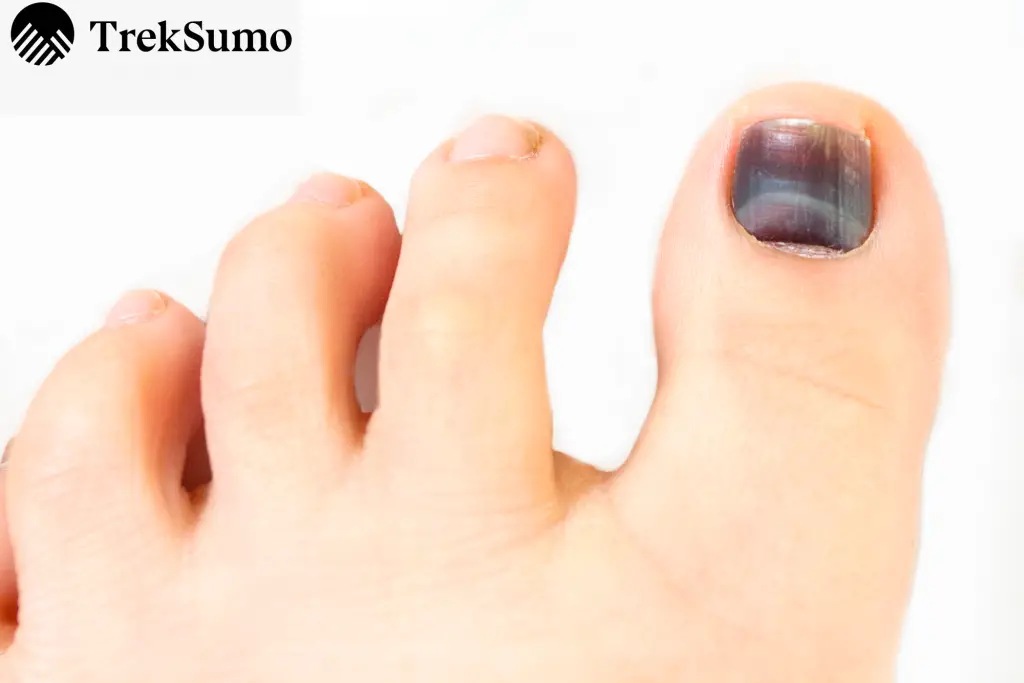
Getting the toe-box sized right – avoid black toenails!
Sizing the toebox of any footwear is important because uncomfortable feet are unhappy feet. And if your feet aren’t smiling on a long hike, then neither are you.
The key to getting this part of the fit right is captured in one word: comfort. The toebox should be wide enough that it doesn’t pinch your toes when you’re wearing hiking socks. For the best fit, size them with a new pair of socks you’ll wear when you’re hiking. And if you’re the kind of hiker who wears a thin pair of liner socks underneath a thick pair, then wear both during fitting.
For a good fit, the toebox should have about a finger’s distance gap between your longest toe and the boot toecap. I have Viking-toes aka my second toe is longer than my big toe and about the same length as Gonzo’ nose! It’s important to size any footwear around the longest digit on your foot, not your big toe.

Going beyond the feeling of comfort, one of the main reasons for getting this part of the boot fit right is that it will reduce the risk of your toes bumping up against the inner of the toecap, an action that can cause black toenail. Trust me, this is a pretty painful experience which is preventable.
Toebox sizing tips
1. Wear the same socks you hike in.
2. You should have about a finger’s width between your longest toe and the cap of the boot.
3. Test them on an incline. A good outdoor gear store will have a small ramp you can walk down to ensure your toes don’t butt up against the toecep.
Heel drop – it’s not a dance!
No, heel drop isn’t a revitalised dance craze that faded during the late 50s, only to resurface in the 2020s! What this refers to is the height of the heel and it’s a measurement universal across all footwear. When we say ‘drop’ we mean height, it doesn’t sound quite as funky as drop, or carry as much of a sense of danger.
For most hikers, heel drop is a personal preference. I prefer a low drop of 5mm to 3mm, and you may decide to go higher, or lower.
The lowest heel drop found on hiking boots is 0mm, and there are many benefits for anyone with a preference for zero drop. Aka barefoot, a 0mm drop places your feet in a position that is identical to wearing no footwear, which is how our bodies were designed when we first started to evolve into modern humans/or God-determined (take your pick, all beliefs are welcome here).
Advantages of zero drop:
- Strengthening of calf and lower leg muscle
- A natural walking position helps to reduce the risk of injuries when you’re hiking.
- It’s a lighter boot as there’s no heel wedge and cushioning is minimal to non-existent.
Disadvantages of zero drop:
- If you’re a first-time ‘zero dropper’, it may take time for your body to adapt to this new foot position.
- A switch to this style may leave you will aching calves for a few weeks.
Boot width
Getting the width right is another hugely important factor when it comes to finding the right boots. I won’t labour this point. As with toebox sizing, you must wear the same socks for fitting as you hike in. When you’re trying out in-store, spend a little time walking around and ‘feel’ any pinching of the toes and tightness across the bridge of your feet. If you feel high tension, just say ‘no’, especially if you plan to use a thicker pair of insoles.
Tightness can lead to injuries, including sprains. Worse, tightness leads to aching and fatigue, two factors that will make your trip into the great outdoors a miserable experience.
Is there a perfect-fitting boot for every hiker?
No, there is no one perfect-fit that will keep every hiker happy. That magic chalice has yet to be invented.
We are all born different. Some of us, like me, have obscenely long toes we use for painting and writing. Some of us, like me, have very wide feet that make us as quiet as elephants and less likely to sink in swamps. Others have ‘normal’ size feet, which makes buying any kind of footwear a dream-like, simple process.
The point is : you’ll need to find what works best for you, based on the advice in this post.
Simple ways to protect your feet during the breaking-in process
So, you’ve found a good-fitting model that meets your very strict hiking requirements. But before you pull on a huge rucksack and head out onto the hills and trails, there are a few things you can do to protect your feet during the breaking-in process.
Over the years, I’ve heard of many techniques that will help keep your feet happy and pain-free whilst breaking in your boots. Some, such as toughening up the skin of your heels with alcohol, are poor advice. Just don’t! Save it for a special occasion.
Here are a few tips that do work:
Tape up your feet. If you already know where you experience hotspots (the sting that comes before a blister), then apply tape. And before you go hiking, take notice of any places where you feel rub… and tape those areas too. The best tape for this practice is zinc oxide tape – super-sticky and way tougher than your feet, it can take a real pounding. Note: if the tape peels away from your feet it will stick to your socks and it difficult to remove.
Wear your boots in the house for the first couple of weeks. Short periods of walking around the house will start the process of stretching the material and moulding it to the shape of your feet. Start with 30 minutes and work up to a couple of hours over the course of 14 days.
Wear your them outside for short walks. I’m sure you saw that coming, but you’d be surprised how many people simply transition from unboxing to huge blisters because they headed straight for the hills. After hiking around the house, get outside out on short walks and build up to a couple of hours rambling before you use your boots on a full-distance hike.
Summary: the quick list of how to prepare your feet
Here’s the ‘too long, didn’t’ read list of steps you need to go through before setting off on a big hike:
- Use zinc oxide tape, or similar, to protect your feet
- Start the breaking in process at home.
- Once your boots have moulded to your feet, take them on a series of short hikes.
Synthetic vs leather: which is faster to break in?
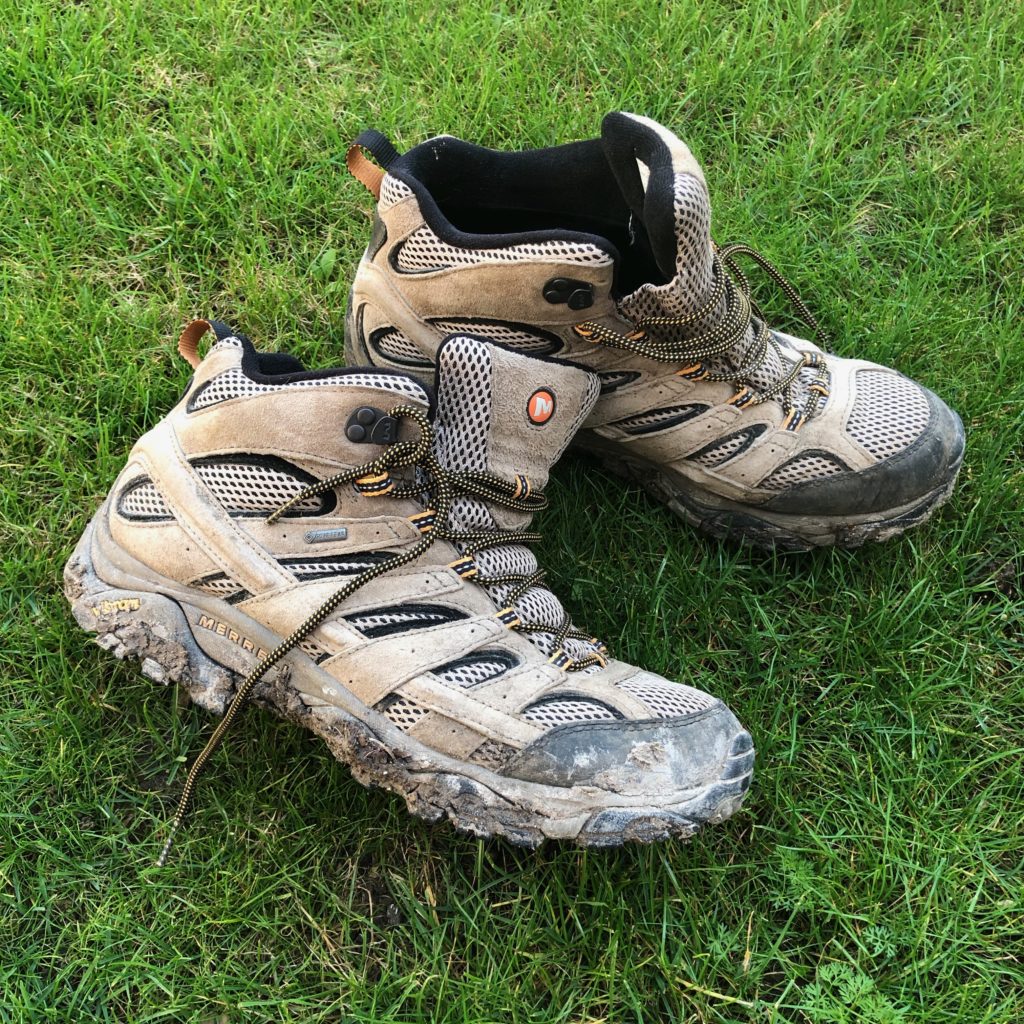
Most people assume leather takes longer to break in, but we’ve moved on from the 1980s when hiking footwear was nothing more than huge blocks of leather that took years to soften and lasted several centuries before you needed to buy a replacement. Softer leathers such as nubuck are now standard on lighter pairs of footwear which means the time to break in is much reduced. My Merrell Moab 2 mid GTX are a mix of GORE-TEX and nubuck leather, and they required only a couple of weeks pre-hiking to get them ready for the trails.
Heavier boots, the kind used in arduous terrain and on mountains, still need a good amount of preparation before you use them.
So does this mean synthetic materials are a better option if you don’t want to break the min? No. Even man-made materials can be stiff and uncomfortable when you first pull them on. And they still need shaping to your feet, unless you want to experience nasty blisters and other injuries such as black toenail.
It’s often impossible to tell which material will break in faster and a good rule of thumb is to follow the entire process in this guide.
Summary: the material is irrelevant
Yes, the material used to construct your boots is irrelevant and you still need to go through the process of breaking them in.
In some cases, as with my Moab 2s, you might only need a short period of ambling around town before they’re ready to go, but this is a rare occurrence. Stick to the process and save your feet from suffering!
Can you break in hiking boots fast?
I mean, really?
No. Now I know you’re feeling I teased you with the title of this post, but it was done for a reason – to show that any attempt to get your hiking boots ready for walking fast is not advisable. That said, you may find some pairs need little to no prep work before you can wear them on the trails. The problem is there are many myths that, even in an age of science and enlightenment (thanks Rennaisance Period), still persist and continue to trick hikers into believing they can have their boots ready to go in a matter of hours. Let’s look at a few of those fairytales:
- Urinating on the material will help soften it fast. Out and out lies. No, not only will the salt in your pee damage the boot material (it draws the moisture out and you risk degrading the outer), but you’ll also stink on a warm day. Personally, I don’t want to be known as ‘the hiker who smells of pee and wears cracked boots that are no longer waterproof’).
- Heating them over a fire, or on a radiator, softens the material. Triple no! Like the ‘peeing on my boots’ method, artificial warming extracts moisture from the material. Now this is fine if they’re waterlogged after a mammoth trek, but new boots don’t need to be dried. Heating them could cause damage.
- Leather softeners make the material supple and comfortable, so that must be good… Right? Once again, no. Some of these products break down the fibres in leather and synthetics, and this will cause the uppers to become saggy and loose fitting. And with a poor fit comes our old friends ‘blisters and black toenail’. Oh, and you’re likely to need to replace your boots more often if you use any kind of softener.
Summary
Pee, lotions, heat… they’re all bad for your boots. And your feet. And, in the case of urine, any friendships you may have built off the back of your hiking and trekking trips. The biggest piece of advice I can offer is to steer well clear of any old wive’s tales.
Dealing with hiking injuries to the feet
The two big injuries that come to mind are: black toenail and blisters. We’ve written a couple of posts: how to avoid black toenails and the blister prevention guide, but the best piece of advice we can offer is to ensure your footwear is sized right and has been broken in before you set off on a long hike. The two guides I’ve linked to in this post have advice for anyone who picks up one of these injuries whilst hiking.
Not all blisters are made equal
I couldn’t resist adding the image below… Blisters come in all sizes and degrees of intensity. One of the most severe examples I’ve seen was when half the sole of a friend’s foot peeled off due to a huge blister that formed on a ‘fun’ Army hike we embarked on during a selection course. Don’t worry, we taped the huge flap of skin back in place and he was able to complete, and pass, the course (which included a 64km ‘hike’’ in the final 24 hours).
Other blisters are tiny, but sometimes no less painful. Some are huge and barely noticeable, like the two 1.5cm deep blisters that developed on my inner heel whilst skiing across Greenland. Some are superficial, but incredibly painful… like this:
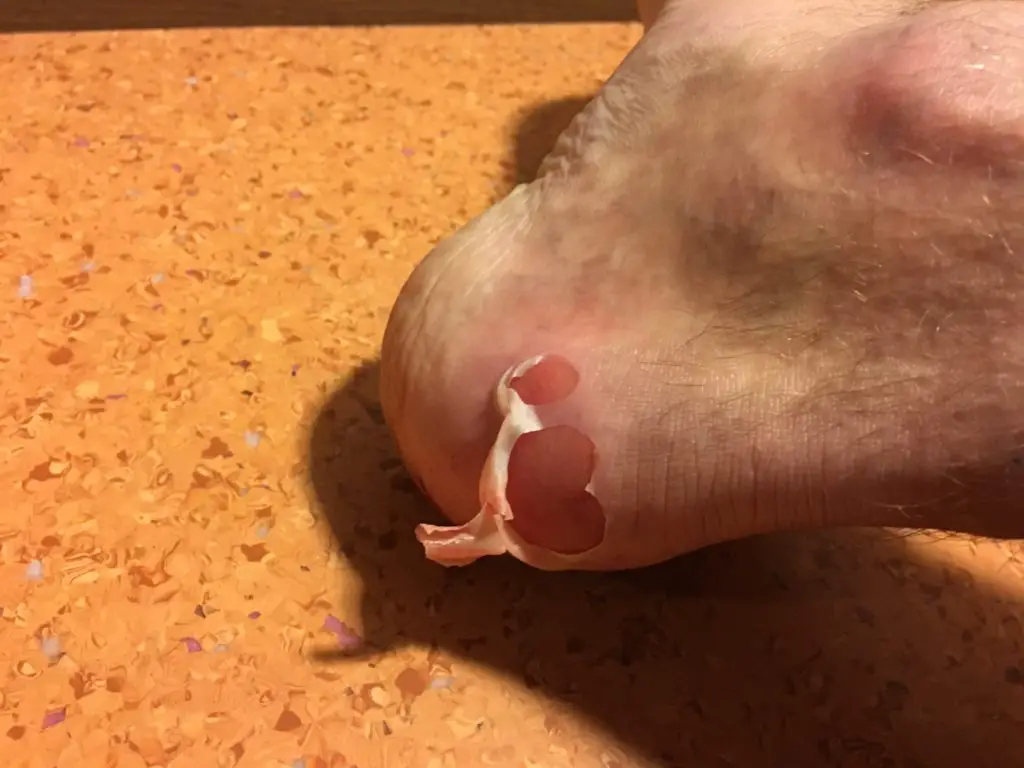
The key point here is: blisters affect us in different ways, but they must always be treated fast to prevent complications. Take care of your feet.
We hope this post addresses the question(s) of how to break in hiking boots. What do you think?
A question: has this guide been useful?
Jake and I pour a lot of experience into these posts and we do hope they’re useful. If you agree, feel free to let us know in the comments section below. And if you have more thoughts and advice on the breaking in process, then let us know. And, most of all, let all your friends know about this really cool, sometimes tongue-in-cheek, guide on how to turn your hiking boots feel like mountain slippers!