How to use the Garmin eTrex 10 handheld GPS and Avoid Geographic Embarrassment
Learning how to use a Garmin handheld GPS is simple and one of the best devices to learn on is the eTrex 10
Hi, today you’re going to learn how to use the Garmin eTrex 10 handheld GPS (here’s a review I wrote).
Why?
Because it’s one of the best handheld GPSs you can buy. It’s costs less than $100 (you can pick up the eTrex 10 for £80, or less, in the UK). It’s rugged like a wiry goatherd roaming the mountains. And it’s so simple my dog could learn how to use it.
Note: I don’t have a dog. I wish I did so that I could teach it to use the eTrex 10 and prove myself right.
But why the Garmin eTrex 10 GPS?
Once you know how to use the most important features on this GPS device you’ll never have a problem using any other Garmin navigataion devices. Period.
More important is the simple, easy to use feature set on the Garmin eTrex 10 GPS. Some handheld GPS units can download over sateliite links, which is useful if you’re in trouble. But, to my mind, this reliance on tech and a lack good map reading skills has caused many injuries, and a few deaths.
For that reason, we’re going back to basics. You’re going to learn how to set up and use your GPS before you hit the trails. More important, you’ll learn to trust the skills you develop.
But, don’t neglect your map reading skills
These are essential. Knowing how to use a map and compass well could mean the difference between life and death.
Technology is useful up to a point. But when it fails you’d better have the skills to get you out of the pan fast. Or a helicopter on hand to rescue you.
The Garmin eTrex 10 Features You Need to Know
You’re going to learn the essentials.
The eTrex 10 has many features that you’ll never touch. Sailing around the world? Please do learn how to activate the man overboard feature.
I had to shout that phrase once. It was a lucky day for my colleague. He was cold afterwards, but grateful to be alive.
Let’s leave that story for another day.
Here are the functions you’re going to learn about:
- Accessing the menu
- Viewing satellite connectivity
- Waypoints
- Bearings
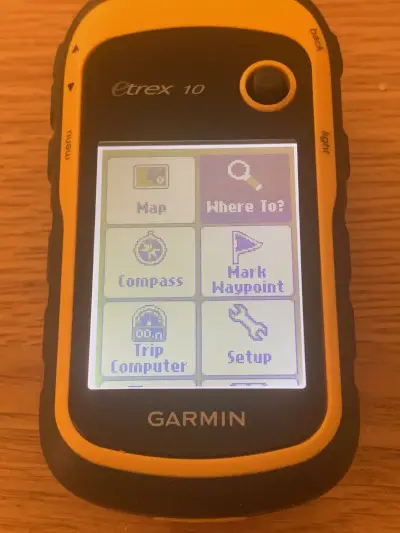
The eTrex 10 Menu System
Power on the eTrex 10 by pressing the top right hand side of the chassis ()as you look at it). A boot screen will appear. The home menu will appear a few seconds later.
Now use the navigation joystick to move through the menu options. Click the joystick in to select the settings/functions you want to access.
Moving around the system is easy.
Before you start to use the other features, you will need to configure the unit.
Do this by scrolling down until you the ‘Settings’ option, then click to entre.
You’ll need to configure the following:
Units
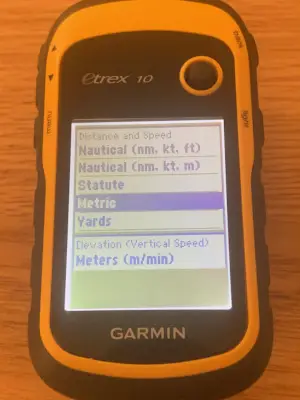
Metric, staute or nautical. I recommend metric (metres and kilometres) for activities like hiking, skiing and expeditions.
GPS Position Format
Always configure the position format to match that of the maps you carry. Having a super-accurate GPS is useless if you can’t find your corresponding location on a map.
Heading
The default display is ‘Numeric Degress’ and the ‘North Reference’ set to magnetic. If you need more accuracy in your bearings and route planning, change this to ‘Mils’. But, only if you are confident navigating in this format and you’re using a military style compass.
Waypoints
There are two parts to understanding waypoints. First, you need to know how to create a waypoint. Afterwards you can change them, use them to take a bearing and plot your route.
Satellites
Easy to use and gives you some useful information at a glance.
Ready? Cool, let’s get your eTrex 10 setup and ready to go.
Powering On The eTrex 10 GPS
Look on the right hand side of the chassis and you’ll see the power button. Press and hold for 3 seconds to see the boot screen.
The eTrex starts fast. You should see the home screen in less than 2 seconds. But this doesn’t mean it’s ready to use as the unit will need to acquire satellite links. More on this later.
Quick tip: is the screen too bright or dark for you? If so, press the power button once (don’t hold as this will power down the GPS).
Now you’ll see a screen like this:
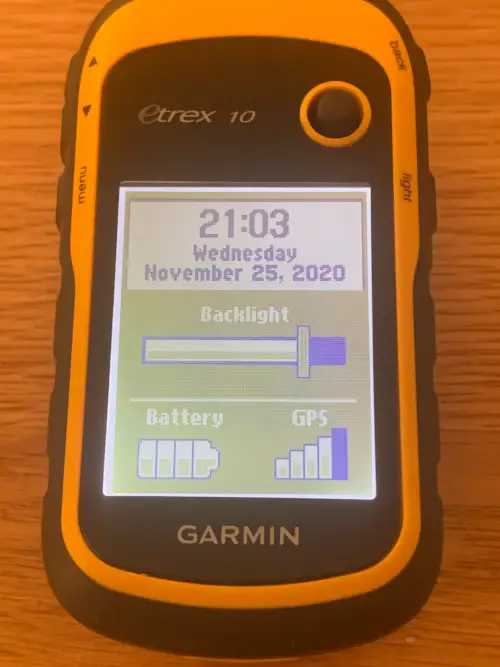
Change the brightness using the joystick, moving left or right until you’re comfortable with the display brightness.
Change The Etrex 10 Units of Measure
Note: a unit of measure is a fancy name for distance, speed and elevation.
Out of the box, the eTrex 10 units default to kilometres. I tend to leave this setting as-is. All the maps in my collection use km as the unit of measure.
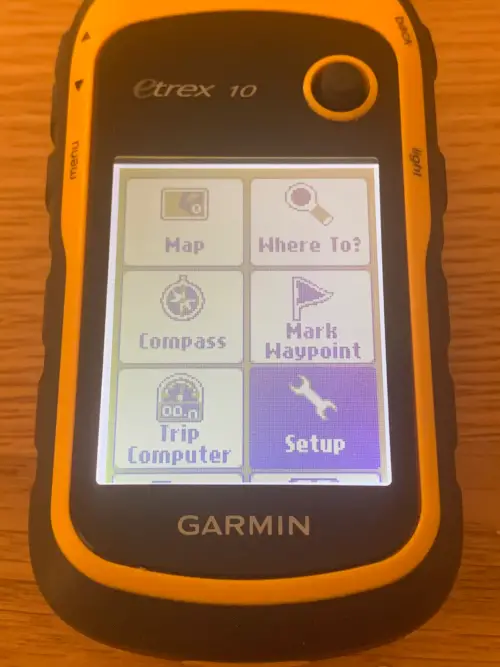
From the home screen, scroll down to ‘Setup’ and click the joystick.
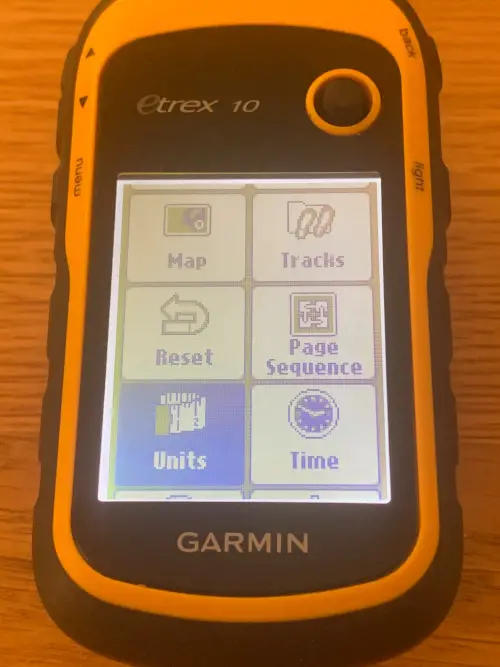
Navigate down the settings page and highlight ‘Units’. Click!
Highlight, click and modify the units of measure to suit your own needs.
Configuring the GPS Position Format
The GPS position format is important. This setting must match the maps you’re using. Most important is the Map Datum, which is the coordinate format your GPS will use.
I can’t emphasise enough the importance of getting this configuration right. Incorrect configuration will result in inaccurate map readings. Do you want to get lost in the dark on the moors?
To change these settings, first collect the datum information from your map. In the UK, we use Ordnance Survey GB (OS GB). During my travels abroad I use UTM UPS.
Enter the ‘Set up’ option, scroll down until see ‘Position Format’. Click and then modify.
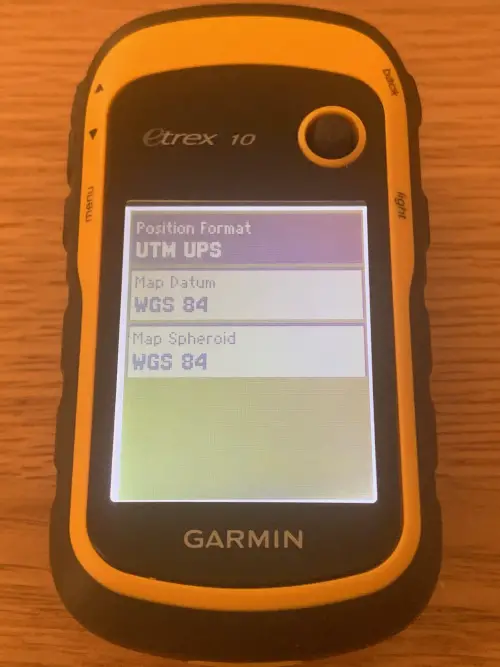
Note: the map spheroid is the coordinate system that corresponds to the Map Datum you choose. Most datum settings have only one map spheroid.
Waypoints
Beyond the Position Format, Waypoints are the heart of the eTrex 10’s navigation system.
What is a GPS waypoint? It’s a marker you create as part of a route, or as a reference point on your journey.
There are three ways to create a waypoint:
· Use the Garmin desktop app and a data cable to map the coordinates on your PC and upload them.
· enter coordinates using the eTrex 10 keypad. I recommend you do this only once so that understand the pain explorers experienced in ‘ye olden days’!
· Whilst out in the wilds, by dropping a ‘pin’ in your current location.
Today, you will concentrate on manual entry and dropping a pin. We will cover the Garmin desktop app in another post.
Waypoint Configuration on the Move
From the home screen, click the ‘Mark Waypoint’ menu option. You’ll see a view like this:
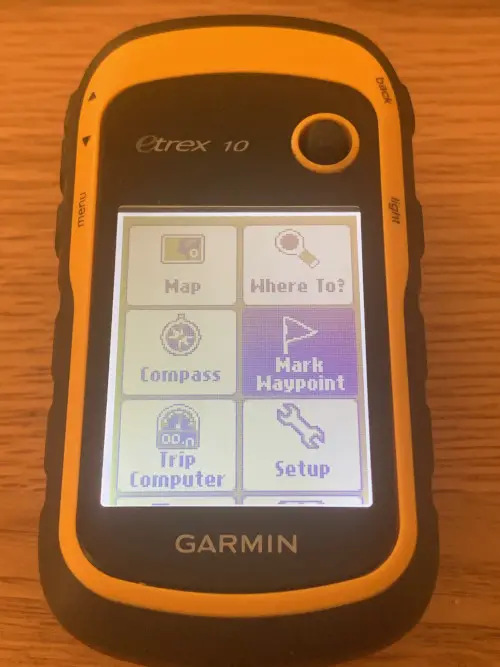
By default, the system will log your current coordinates. Clicking ‘Done’ will create a waypoint on your current location. This is also known as ‘dropping a pin’.
Give the waypoint a useful name:
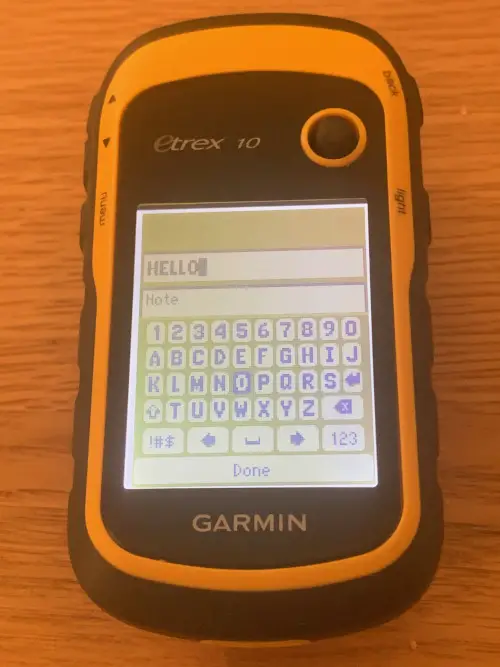
Add a note
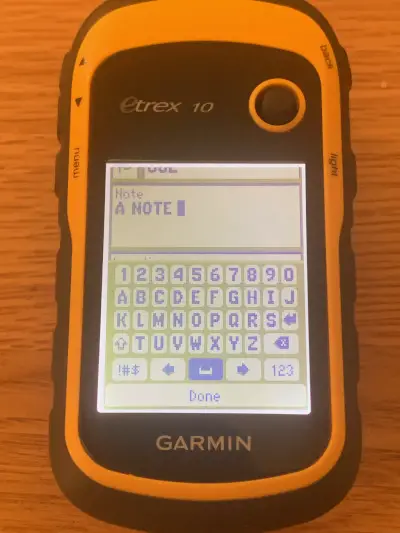
Click ‘Done’.
Your first waypoint is ready. Good job.
Next, the tedious way to configure waypoints…
Manual Waypoint Configuration
Useful for creating waypoints before you start travelling. But manual configuration is slow and tedious. And you risk making errors. Have a second pair of eyes to check after you configure manual waypoints.
Follow the previous process for dropping a pin, but don’t click ‘Done’.
Use the toggle button to tab up twice and highlight the Location box. Click the joystick once.
You’ll now see a numeric keypad and navigation arrows. Use the keypad to enter the coordinates from your map. If you don’t need to change a particular digit, use the left and right arrows to navigate past it.
Now configure 20 waypoints and tell me you weren’t bored!
Where to?
Now you can use the waypoints to calculate bearings and distance.
From the home screen, locate the ‘Where to?’ icon and click once.
Now open the waypoints menu option and you’ll see those 20 waypoints you configured by hand. You did as I asked, right? You spent hours creating waypoints instead of tusing the desktop app? Cool.
Notice how each waypoint has a distance and a bearing listed below it?
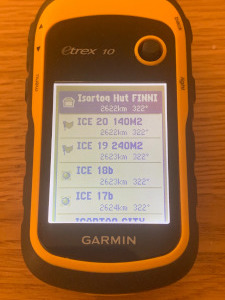
Use this ‘at a glance’ information to confirm you’re travelling on the correct bearing. It’s also a great way of tracking how much distance you’ve covered each day.
Now transfer the bearing to you compass, power down your GPS and start moving towards your goal.
Easy, eh?
Selecting and clicking ‘Go’ will start the eTrex 10’s tracking feature, which will update your progress on the move. It’s a useful feature, but will drain your battery fast. If you must, use it only when you pause for a rest.
Are there Maps for the Garmin eTrex 10?
No, which is a shame as having eTrex 10 maps would make life so much easier. This GPS unit has a very small amount of storage and no micro-SD slot, and the only mapping you have available is the global data pre-installed.
Like I said, this is a pretty basic unit.
What about the Garmin Route Planner?
I don’t use it.
The ‘Where to?’ function and waypoints are all I’ve ever needed as navigation aids. Feel free to try out the route planner, but only after you’ve honed your basic skills and learned how to use the eTrex 10 like a pro!


