Hiking Tips and Trick
A growing list of hiking tips and tricks: for beginner hikers, and beyond
No matter what your chosen outdoor activity – hiking, backpacking, ultra-lightweight, fastpacking and beyond – there are what some hikers call ‘hacks’ that will make life easier for you. Jake and I pooled our thoughts to create this list of hiking tips and tricks we hope will be useful for everyone, from beginners to seasoned hikers looking for any advice that will make their time on the trails a little bit easier. A quick note: if you’re the kind of outdoors person who likes their experience to be rough and hard work, then stop reading now – these tips aren’t for you.
- A growing list of hiking tips and tricks: for beginner hikers, and beyond
- Hiking tips: the basics
- Terrain
- Choosing the right hiking gear is more important than some people realise
- Planning your routes
- Hiking Gear
- General Hiking Rules
- Keep To The Tracks
- Don’t GeoTag Your Locations
- Let Nature Take Its Course
- Go Re-chargeable
- Use Public Transport
- Ask Questions
- Embrace Isolation: Ditch Your Smartphone
- Bag It Or Bury It, Don’t Leave Your Poop Stretched Across The Trail
- Recycle Your Water
- Get Comfortable With Pain And Treating Injuries
- Be Safe, Be Seen
- Hot Weather Hiking Tips
- Key Considerations For Hot Weather Hiking
- Take The Right Outdoor Gear And Supplies
- Plan Shorter Legs Between Waypoints
- Set A Comfortable Pace
- Staying Healthy When Hiking In Hot Weather
- Other Considerations
- Hot Weather Hiking: What Next?
- Wet weather hiking clothes
- Wet weather hiking clothes
- Crossing a River
- That's it!
- General questions about hiking clothes
Hiking tips: the basics
In this section, we’re going to cover off the basic hacks, advice and tips that every hiker, or backpacker, should be aware of. There’s no magic. Instead, these are the basics you need to consider before you start out.
First…
Backpacking vs hiking vs ultra lightweight hiking: is there a difference and will it change these tips?
First, let’s break this down. All three are very similar in nature. No matter which you choose, you’re going to be carrying your outdoor gear in a rucksack on your back. Hopefully… if someone else is hauling all your equipment you’re not getting the full outdoor experience.
Some people might argue you’re less likely to carry a ruck on a hike, but this is wrong. As you’ll see later in this post, there are essentials you’ll need to carry and the most efficient means is in a rucksack, on your back.
Let’s get the definitions out of the way:
Backpacking: a form of hiking where you carry your belongings in a rucksack. Note this is different to hiking as you don’t necessarily need a rucksack or backpack, and you certainly don’t carry all your belongings on your back.
Hiking: the art of walking cross country, between two or more set points. Distances can vary between 3 miles (what I believe to be the shortest length) to many hundreds of miles on routes such as the PCT.
Ultra lightweight hiking: a minimalist approach to being outdoors. By this, I don’t mean you’ll be stamping over the hills, and along trails, wearing only your underwear and a pair of sandals! Going ultra lightweight means cutting down the amount of gear you carry to the bare minimum.
This is a very quick rundown. For a more detailed explanation of each type, check out this post on the different types of hiking.
Terrain
The ground you’ll cover will affect your decisions. From the right equipment to the routes you plan, every aspect of your hike is affected by terrain. Here are a few hints and tips to help make your journey more smooth.
Trails
What is a trail? It’s what can be defined as a well-beaten route, or path. Clearly marked by the passage of many feet, trails are often visible for many miles and are easy to navigate. Good mapping – software, or paper-based – shows trails.
Hiking tip 1: following a trail may not be your best approach, in particular if you don’t want to add miles to your route. Most trails travel the easiest route to a given point which, in most cases, means they take longer to cover than going direct.
But, for ease of travel, a well-walked trail can’t be beaten. Jake and I often make use of public footpaths, rights of way and trails to cover ground faster, stepping off to move cross country to our chosen destination.
Roads
Although we prefer not to hike on roads, there’s no denying this type of terrain is easy to cover and allows us to move fast, and even run if we’re fastpacking. But, as you’re no doubt aware, there are inherent risks the most obvious of which is motorised vehicles (some drivers seem to be ‘pedestrian blind’).
Choosing the right hiking gear is more important than some people realise
Back when I was a young man… Oooh, I went a little misty-eyed there… seems like so long ago.
I digress.
In my youth, choosing the right gear was easy as there were only a few options available. They were:
- Heavy, cumbersome equipment that was waterproof;
- Slightly less heavy equipment that wasn’t in any way water resistant;
- Jeans, trainers, a T-shirt and a plastic shopping bag (the latter doubles up as a 100% waterproof shell layer in the event of a downpour, but your arms got wet!)
Times have moved on and we hikers now have a smorgasbord of gear options that can tailored to a very fine degree to match our needs. There’s only one issue: the expense. Let me explain.
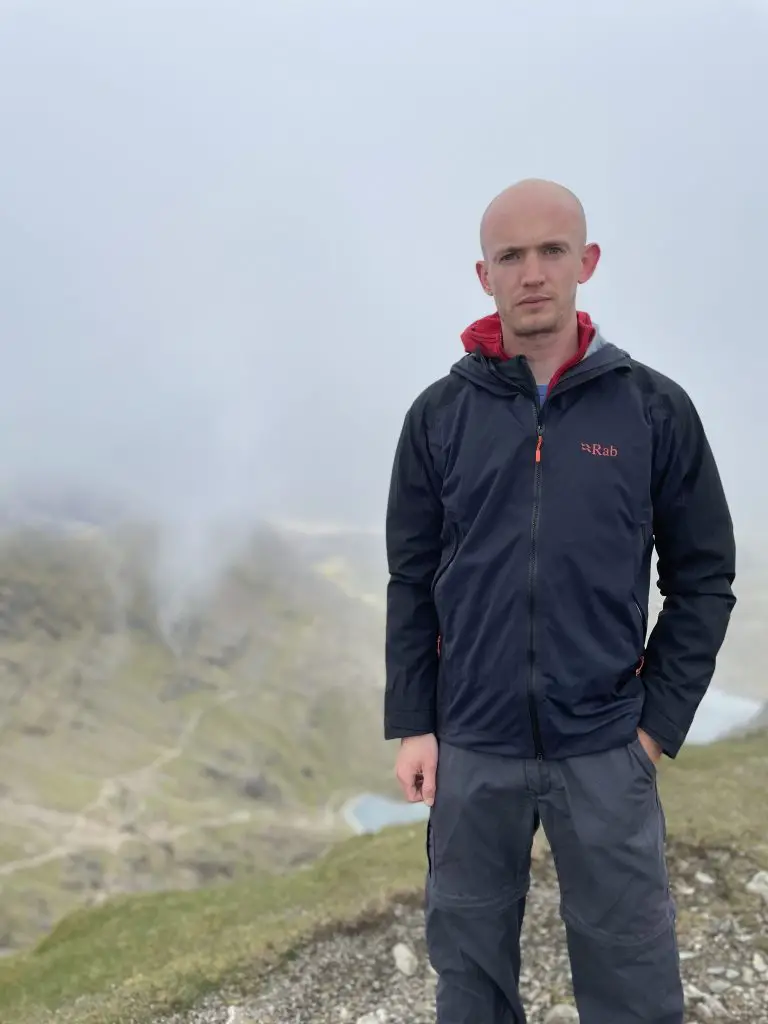
Some time back, Jake wrote a cracking Rab Kinetic Alpine 2.0 review (I encourage you to read it – great jacket, great writing). One of Rab’s premium shell layers, the Kinetic is comfortable, waterproof and… a little pricey. That said, it is efficient at doing what it says on the tin.
The problem comes when you decide to set your sights on hiking as many regions and climates as possible. For each of these, you’ll need some specific gear, which means the cost of your adventures will ramp up fast. Our next tip is:
Hiking tip 2: start small. Choose a destination, or series of routes, within the same geographic region and where the weather patterns are identical, or similar. This will reduce the initial outlay for equipment.
Planning your routes
No plan survives contact with the great outdoors! Okay, so I took the original quote from Von Moltke, a Prussian General who fought at the Battle of Waterloo, and modified it. But the basic premise remains the same; no matter how well you plan there will be eventualities that throw a spanner in the works.
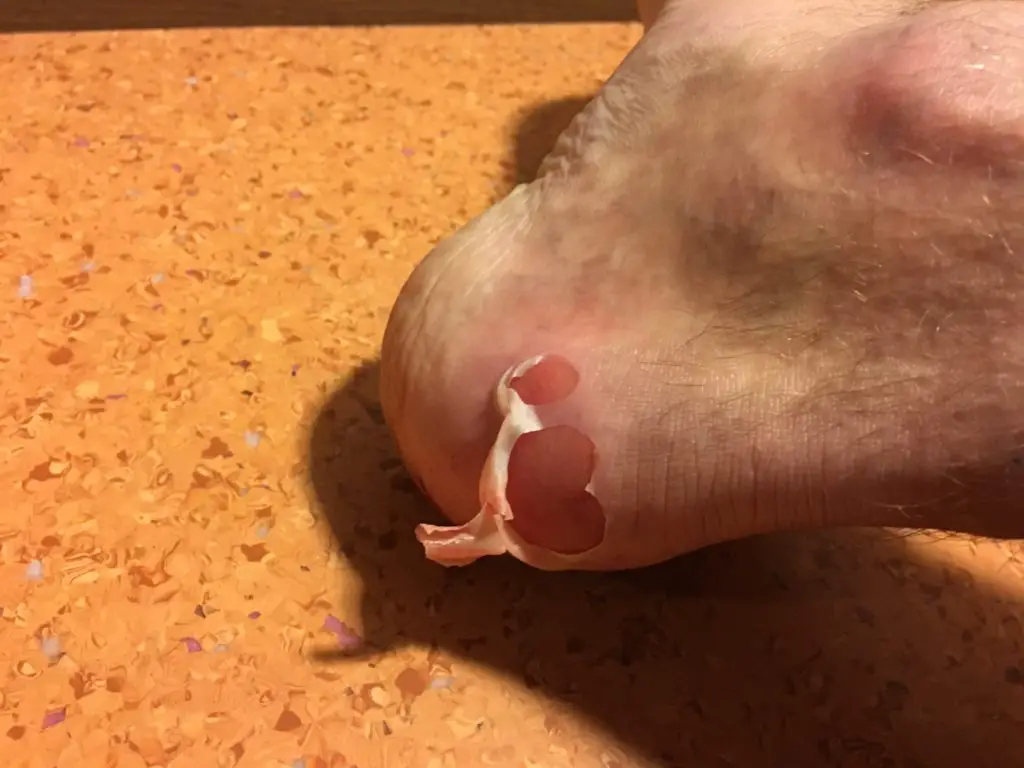
A prime example is blisters. No matter how well you prepare your boots and feet, there is always a risk you’ll develop one or more blisters on your hike. Does this mean you should simply discard any notion of a plan and wing it?
No!
Whilst plans do go awry, your best option is to have one and stick to it as close as possible. That way, even if you do experience some ‘bumps’ along the way you will still have a reference to work towards. Of equal importance is having a plan in the event of an emergency as rescue/support teams will be able to locate you.
What plans do you need for hiking?
- A route plan
Route planning and documentation are key to a successful trip. No matter where you travel, having a documented route – in paper or .gpx format – will aid in keeping you on track. In addition, your route plan can be used by rescue services to work out your location… assuming you stick to your plan. And even if you don’t, your rough location can be calculated.
This type of plan is simple to create. You’ll need to document each leg of your planned journey, adding in distances and bearings between each waypoint.
Here’s an example (you can download a copy at the end of this post):
| Date | From | To | Bearing | Distance | Note |
| 1st Mar 2023 | Grid reference 123456 | Grid reference 234567 | 183 degrees | 13km | 1 hour pause at Mount Kneeache |
| 2nd Mar 2023 | Grid reference 234567 | Grid reference 345678 | 220 degrees | 15km | 1 hour pause at Bittersweet River fording point. |
| 3rd Mar 2023 | Grid reference 345678 | Grid reference 456789 | 135 degrees | 17km | Finish point at Craggy Jaw |
The next most important step is to share this documented route with people you trust. Why? Because if nobody knows where you are, and you’re not carrying a device like McMurdo FastFind or InReach, you’re making it harder to be found.
- First Aid plan
Pause for a moment and ask yourself which are the most common injuries experienced by hikers? The obvious are blisters and cuts, but there are a few more that make hiking difficult. The following injuries are the ones Jake and I consider most likely to slow, or halt, your hike:
Blisters: poor fitting, or worn boots, can result in huge and painful blisters that put an end to your dream of hiking the PCT in one hit! This type of injury can range from small and irritating, to huge and painful. Good fortune smiles upon you – Jake and I have written a blister prevention guide that walks (haha!) you through this injury and offers plenty of tips on reducing the risk of them forming.
Burns: if camping stoves were animals they’d be apex predators! In all honesty, I’ve had so many burns caused by stoves I’m sure mine is trying to do me in! Joking aside, burning your fingers and hands is easy and very painful. The most common causes of burns are:
- Boiling water spills;
- Stove flare-ups (when an excess of fuel is in the air at the point of ignition);
- Picking up a hot pot with your bare fingers (I’ve done that a couple of times).
You need to treat burns fast, and in an efficient manner to prevent them from becoming infected.
- Meal plan
I find one of the easiest mistakes to make is not planning out meals needed for the journey. For a number of years, I underestimated how much food I’d need for the entire hike and often found myself going hungry towards the end of the trip. For short hikes, this is not a big issue. If you’re trekking long distances your calorific intake becomes an important consideration. Rather than give you an exact calculation of the calories, proteins and carbs you’ll need (which is impossible as I don’t know your exact circumstances), here’s a tip:
Hiking tip 3: Take your daily recommended calories and multiply them by 50%. And more if you’re planning an arduous event, go big on calorific intake; on my treks across Greenland, and to the North Pole, I more than doubled the number of calories eaten each day.
And if you have food left over, you can always ‘donate’ it back to nature. But no feeding the wildlife – that’s bad for the bears, horses, etc – and the people our furry countryside inhabitants (including predators) seek out in the expectation of an easy meal.
- Water plan
Carrying enough water for a 5 day hike is hard work. Sure, it can be done but you’d need to minimise your water usage which may not be an option in hot climates. On average, the human body needs around 1 litre of water per hour and if you’re planning to trek 20+ km per day a huge amount of your pack weight will be precious H2O. The major issue here is weight: 1 litre of water weighs around 1kg… which you need to carry. Can you see where this is going?
The best option is to plan a route that crosses or runs close to, natural water supplies. Fast-flowing rivers are best, as long as you don’t fall in, as there is near zero risk of drinking stagnant water. Your second best source of water is from slow moving streams, and then pools.
No matter where you source your water, sterilise it. The following methods work well:
- Boil it for at least 15 minutes;
- Use purification tablets;
- Drinking through a specialised drinking straw.
More tips can be found here.
Hiking Gear
TrekSumo is, amongst other things, a hiking gear review site where we also offer advice and tips to people who love the outdoors. Jake and I also have a wealth of experience when it comes to choosing the right hiking clothing (summer, or winter), much of which is based on items we’ve reviewed. I think we’re in a good place to offer some useful hint and hacks…
Depending on your experiences, it could be argued that both clothing and footwear are equally important. And I agree. But for now, we’re going to make your feet the most important consideration.
Hiking footwear
As we’ve already discussed, the right footwear can make or break your trip. That doesn’t mean you need to break the bank, but your equipment needs to be serviceable, well-fitted and on a budget you can afford and maintain. Dashing out and buying a pair of Arc’ teryx Acrux LT GTX boots for your very first venture into the outdoors, when you don’t know if you’re going to enjoy the experience, can be financially painful. And rather than ask in an outdoor gear store where staff are all to eager to sell you most expensive boots you’re ever likely to buy, ask friends or other hikers (or read our hiking boot guide).
General Hiking Rules
We are hikers, we were born to explore, we travel places many others aren’t interested or inclined to go to. We love the outdoors and the sense of adventure that comes with being in green and wild places. And with that sense of wonder comes a need to protect and preserve the places we trek and explore. But there are rules for hiking (which I invented just before putting together this responsible hikers guide).
Sadly the world is changing and not for the better. The ever-increasing population has placed huge demands on our green and pleasant countryside. Even though the percentage of people who enjoy outdoor activities is still relatively small the population increase has had an overall and quite detrimental effect on the landscape of our planet.
I hate preaching! Unless of course I’m in one of those more moments when I really enjoyed preaching. But today rather than have a little rant I’m gonna keep it simple: today we are going to explore some ideas on how we can be responsible hikers.
Keep To The Tracks
I know this is a really contentious point, but we are trying to preserve the environment. Many tracks crisscross our countries, whether in the United Kingdom, Europe, Asia, the United States of America… et cetera we have a duty to preserve the outstanding beauty of the countryside. Sometimes this means we have to forego, or wind in, our pioneering spirit. But only a little bit.
The idea here is simple: we follow the path’s that have been laid before by people who have gone before us. It’s not a new idea, and even though I love really striding out and exploring I’m happy to go along with it if only to prevent erosion and damage to the countryside.
Don’t GeoTag Your Locations
In a world of Instagram and all the other social media sites that allow us to post photographs of our journey, there’s an overwhelming temptation to tag everywhere we go. Ordinarily, I would wholeheartedly agree with telling people your stories – I’m a storyteller, I love tales hearing them and telling – but sometimes we need to keep our destination is a little bit secret
It’s fun documenting the trails we make, but sometimes our good intentions can be detrimental. Look at it this way, how many times have you found a piece of paradise, a place so beautiful and stunning that, really, deserves to be as untouched as humanly possible? It’s places like this, places that we really go to and the ones that should be protected from the constant stampede of feet and the piles of rubbish left by reckless hikers, that we should hide from the world.
It breaks my heart to say this, sometimes it’s much simpler and safer to not geotag location if only to protect the environment.
Let Nature Take Its Course
“Dad, there’s a bear over there and it looks like it’s about to attack a deer! You have to do something.” Sorry girls, I’ll let nature decide. Most hikers are more than just nature lovers, they love animals too. And I can understand how difficult it is to get involved with the workings of nature, in particular predators.
It seems reasonable to get involved and help protect those defenceless little animals that are about to be eaten by a nasty brown bear. There are a couple of minor issues with these thoughts. First, I’ve been pretty close to the receiving end of the polar bear and, strange as it may seem, I have no desire to ever go there again. I like living. Second, predators have to wait too! Contrary to popular belief they can’t live on our junk and that includes McDonald’s.
Even apex predators face daily risks and
Let nature take its course, sometimes it’s hard, but that’s life.
Go Re-chargeable
I’m often surprised how much equipment, in particular electronic hiking gear, you can buy that still uses disposable batteries. Admittedly most of this gear is relatively cheap equipment that ships from China but it still irritating because a lot of people use GPS units and other devices that have disposable batteries fitted in them.
And aside from the fact that there are some inconsiderate hikers out there accidents do happen and quite frequently we can drop or lose these disposable batteries in the countryside. The resulting care of the batteries results in pollution. This might seem a minor issue to some people but the less pollution the better.
The most obvious answer to only buy equipment utilises rechargeable batteries (which raises the question of how we charge them and we’ll deal with that in another post). And I’m not insensitive to cost – I realise that some people can’t simply afford or simply can’t afford to go out and completely renew all the electronic gear that you use for hiking at the drop of a hat.
It’s an idea: instead of buying new equipment purchase rechargeable batteries. These are a bit more expensive than disposables, and you definitely think twice before walking away when you drop one of these. I probably need to reword this quite drastically!
Use Public Transport
I know this isn’t a new idea, it’s one I’ve kind of pinched from my partner, but I’m surprised at how many people still use cars and SUVs to get to the start of their hiking routes. And this seems counterintuitive (I have been guilty of this too). After all, you go hiking so why do you need a car to get the start point?
In the park past few years I’ve taken a slightly more conscientious approach to my journeys. Where possible are use public transport to get as close as possible to the start point and then set off on foot. This has the added advantage of adding a few extra miles to the journey (TIP: one following this approach it’s a good idea to make sure you factor in the extra distance, at the beginning and end, of your hike to ensure you have ample time and provisions for the journey. I
Ask Questions
What? Ask questions about the route, destination and path taken on a hike.
Here is what I mean: a couple of years ago I was using an ordnance survey map to follow a hiking route, through the Buckinghamshire countryside. About three hours into my walk I crested a small hill and looked down into some dead ground. The route to follow, the direction of the footpath, was barred by a very high fence surrounding the tennis courts of a large country house. I walked down the incline and towards the fence. As I approached someone popped out and started walking towards me.
We met about a hundred metres away from the artificial boundary in the wreck. He told me. He asked me where I was going. Naturally, I told him I was following the public footpath. At this point, he told me that it was private land and was no right of way.
I put up my map and showed him clearly marked footpath. He was adamant that it didn’t exist and that if I went any further I’d be trespassing.
I’ve been map reading for a very long time. My compass work and ability to use the GPS are excellent. Yes, we all make mistakes. In this case, I was adamant that I was correct. That said, I did give the guy a little bit of respect, if only for a short space of time, and navigated my way around the “left “private right” land.
The next working day I headed down to local council offices and raised a query about the footpath.
A few months later I discovered that the guy built tennis courts across the footpath, without permission. I never really bothered to check back to see what happened to the tennis courts but I can imagine they’re not there any more and the guy’s wallet is somewhat lighter.
Always ask questions!
Embrace Isolation: Ditch Your Smartphone
Smartphones are the scourge of society! Research shows they have had a detrimental effect on the concentration of both adults and children, they’re power hungry and quite often you’ll find that your swanky smartphone becomes little more than deadweight when the battery runs out.
Over the years I’ve seen people use their smartphone as a navigation device. Last year, whilst on on a long run, I was approached and stopped by a couple of hikers. They told me that their smartphone battery had drained and they could no longer access their mapping app. Worse, they didn’t even have a real map which to navigate (and, as I soon discovered, they couldn’t actually map read)
Your smartphone might have the best camera in the world, and it might have phenomenal voice-to-text capabilities, but never consider using it as a navigational aid. Leave it at home.
More recently I’ve taken to using a very simple Nokia phone when I go hiking or trekking. It’s brilliant! The battery lasts for several days, sometimes a week. I can make calls and send text messages. I use a separate digital camera for photos. My smartphone problems have been eradicated.
Bag It Or Bury It, Don’t Leave Your Poop Stretched Across The Trail
Poop! We’re meticulous when it comes to cleaning up after our dogs. We’re even more determined to ensure other people clean up after their dogs. So why do some people think it’s fine to leave the footpaths and trails scarred with brown streaks
A time-honoured way of disposing of your number 2 is to bury it (with a 21 gun salute, if you so wish). Nature will send in her army of waste disposal technicians and within a pretty short period of time the remains of last night’s dinner will be fertilising next year’s growth of greenery.
If you’re really determined to leave no sign of your passing you can ‘drop’ your poop into a plastic bag, seal it up and then dispose of it properly when you get home. A word of warning: achieving the necessary positioning of both you bag and hands might take some practice. Keep a disinfectant hand wash close by.
Recycle Your Water
A number of years ago I spent about three months in the Sahara desert. Part of the journey involved meeting Bedouin tribesmen on our travels across that insanely hot barren place. I particularly enjoyed the storytelling; many hours in the middle of the desert, talking with tribesman who retold their culture in broken English. It was a truly amazing time.
One particular, shall we say, extravagance we shared was water. To be precise boiled water served with mint. For anybody who hasn’t been to a desert environment, it’s hard to convey how truly amazingly refreshing this drink is, even when hot in an already stifling environment.
But, as you’ve probably already worked out, there is a catch!
Sadly even when the desert aquifers were fully topped up water was still at a premium. Now imagine the current situation in which these huge reservoirs of water have been drained by the people who most need them. So precious is this commodity that every means possible is used to recycle and replenish the sources of water.
Yes, you know what’s about to come next… Sometime after my first mint tea I discovered I had in fact been drinking urine. A bit of distilled pee, but still somebody else’s.
If you wanna be a real hard-core hiker then I highly recommend drinking your own (distilled) wee.
Get Comfortable With Pain And Treating Injuries
It goes without saying that any hiking trip is going to involve one or more injuries. Although I’ve had some hard knocks over the years I’m quite fortunate in that I’ve never had to saw off one of my own limbs with a credit card. Get used to having and treating injuries.
Years ago when I was on a course in the Army I decided to let an officer do the map reading on a particular section of the route. We followed the path up into the mountains, clambering over wet rocks as we climbed. I slipped, fell about 30 feet and ended up wrapped around a rock in a very unusual position. Pain! To give you an idea of how hard I hit the ground – my rifle snapped on impact.
That was not a good day.
Injuries are as common as muck. Get used to treating nicks, cuts and bites. In fact, even taking off the top of your thumb with a multitool could be classed as a fairly trivial injury (I cut off part one of my frostbitten toes – ouch).
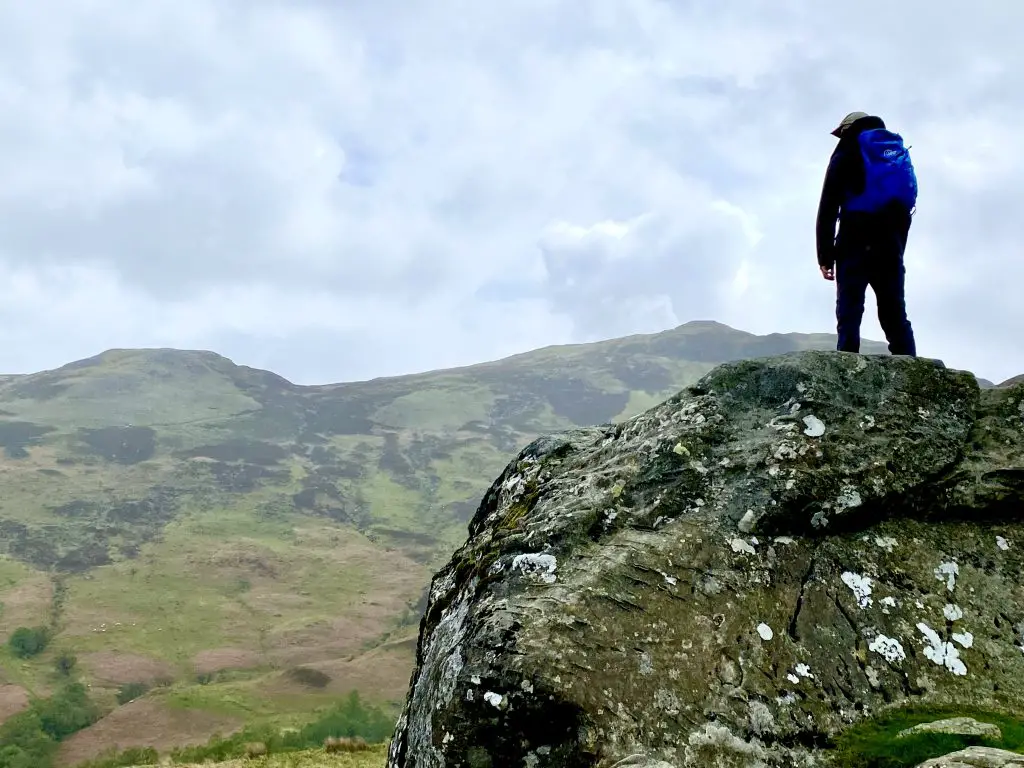
Be Safe, Be Seen
When I was in the Army it was our job to camouflage ourselves and hide from the enemy. If we were operating in Western Europe, in forests and on rolling planes, we wore clothing that matched the environment. Likewise the deserts.
The last thing you want to do is not be seen when you’re hiking. From a safety perspective, it’s better to be visible. Bright, gaudy colours work best.
I know some people like to wear darker, less obvious clothing when hill walking and hiking and rely on marker panels in the event of an emergency. That’s all well and good unless you’re hiking on your own and you end up unconscious or unable to roll out your mark a panel. How are the rescue services going to find you when your olive drab Gore-Tex perfectly matches the surrounding terrain?
Like the old 1970s advert said – be safe, be seen
Hot Weather Hiking Tips
You unzip the door of your tent and the heat rolls in – it’s a scorching day outside. Your lips crack at the more thought of hiking into what will become a midday inferno. Even the parched plants look back at you with pity. But suffering for no good reason is dull and painful, so here’s a big list of hot-weather hiking tips taken from my many miles of exploration.
Let me caveat this post: I find hiking in cold climates far easier than in warmer places. And I’ve been to many cold places.
You’re probably asking yourself, “What type of gear should I carry for hot weather survival?”, or “What food should I take on a hot weather hike?” And we have the answers you need.
Let’s do this…
Key Considerations For Hot Weather Hiking
What do you need to do before lacing up your hiking boots, pulling on your backpack and heading out into another scorching day?
Everything you’ll read here is based on real-world experience. I trekked through parts of the Sahara Desert and travelled through the hottest, most inhospitable jungles in the world. All of these journeys place required me to be self-sufficient; all my food, water and shelter were carried in my backpack.
In some locations, temperatures reached over 50° C. Even though most of you are never going to travel to places where the soles of your hiking boots can melt, the basic rules for hiking still apply.
Take The Right Outdoor Gear And Supplies
Success hinges on planning. Selecting appropriate clothing and outdoor gear specifically designed to keep you cool and comfortable can make, or break, your hike.
Carry Plenty Of Water
Just because you’re not hiking across a desert doesn’t mean water will be readily available. In the jungles of the world, water is plentiful and that’s before the monsoon season begins. But be wary, especially in places where water can be tapped almost on demand – sources can be riddled with parasites and other pretty unpleasant organisms.
When you start thinking about access to water you need to consider the purification process. Boiling water each night in readiness for the next day is the highest priority you have. But you can only carry so much water (consider this: 1 litre of water weighs approximately the kilogram. 5 litres of water is an extra 5 kg of weight).
To reduce the weight, you carry you’re going to need a way of purifying water on the move.
On all of my expeditions and treks, I always carry purification tablets and some of the best drinking straws available to buy at the time. I recommend you use a straw as water purified with tablets can taste like poop.
Wear Lightweight Clothes
When the temperature starts to rise you immediately feel warmer, which is a bit of a no-brainer. When you add in hard physical activity, you’re really going to notice the difference. The type of clothing you need for warm weather conditions needs to be lightweight and have excellent wicking qualities.
Anything that is lightweight, breathable and loose will do. As an added bonus, clothing with good wicking qualities draw sweat away from your body and reduces stickiness.
On my legs I wear a pair of walking trousers with removable lower legs that can be unzipped and removed when temperatures start to get warm.
There are many different options available, but I’m still using my Columbia walking trousers about that I bought about 15 years ago.
Headgear
A peaked cap is ideal for minimising the amount of glare from the sun. Also, reducing the amount of sunlight that hits the top of your head will help reduce the risk of heat and sunstroke.
The longer and harder you hike the more you’re going to sweat. Wearing headgear, whether it be a cap, or a buff wrapped around the top of your head, helps mop up sweat that would otherwise run into your eyes.
Consider Taking Warm Clothing
Consider packing some cold-weather gear. Some of the hottest places on Earth experience a full reversal of temperatures at night. Sizzling daytime temperatures give way to the kind of frigid lows you’d normally only expect to find in Arctic conditions. Going on a self-supported hike requires you to consider every possibility.
You should check historical data for weather conditions in the area you’re going to be travelling through. If necessary, pack some really warm gear like a down jacket. You’ll thank yourself when the temperatures dip.
Don’t Go Ultra Lightweight
It’s easy to fall into the trap of going ultra-lightweight. Going on a short hike shouldn’t be a reason for scrimping on the essentials. In fact, plan for eventualities. For any warm weather hike lasting more than a day, or two, you should use a decent size backpack rather than trying to cut corners on the load you carry.
When planning what equipment you need, be generous. If you think you need two days’ worth of food, pack for three days. Don’t be tempted to take a shelter or tent, that isn’t suitable for the places you’ll be hiking.
One of the most important considerations you can make is around comfort. I find that many of the ultra-lightweight backpacks can be uncomfortable to wear when you add anything over a small amount of weight into them. The straps tend to dig deep and, in most cases, simply don’t provide enough support when you have a significant amount of gear packed into it.
Take The Right Type Of Hiking Rations/Food
It’s a simple fact that physical activity in the cold burns more calories than when performed in a warm environment. The research shows that a long trek through icy wastes will burn an average of 1,000 calories more than a similar journey on a warm day.
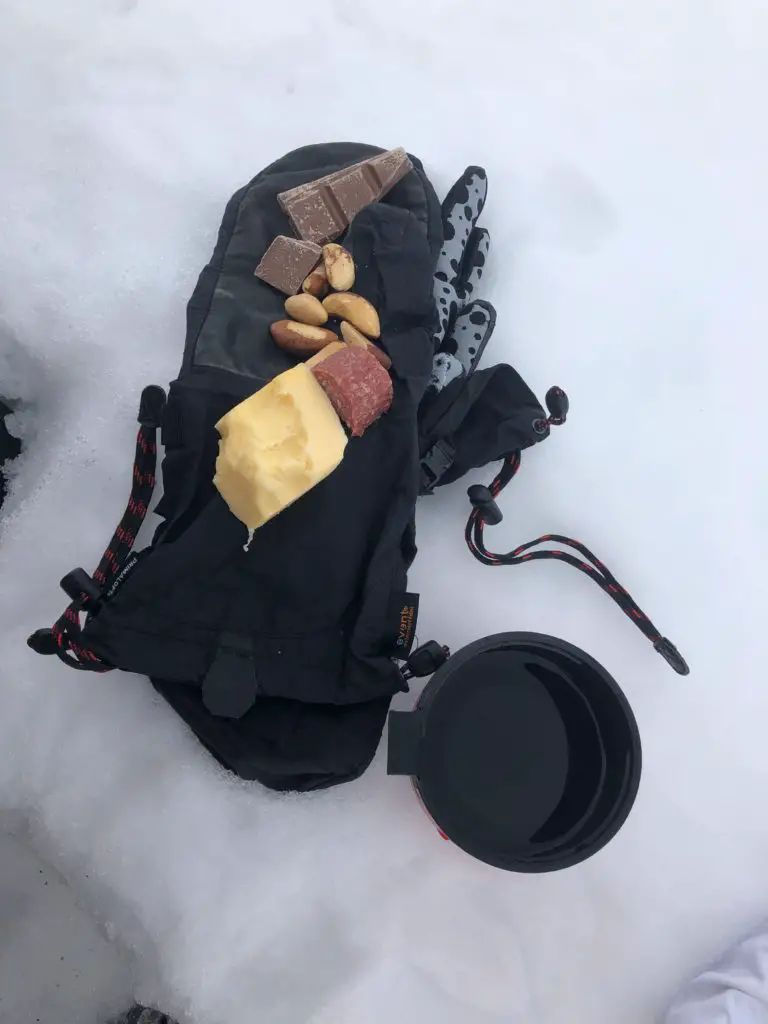
Rather than meals loaded with a huge payload of calories, opt for light options. An example of this would be a high-energy 800Kcal main meal vs a standard 500Kcal.
Don’t pack food that will spoil or melt. Dried noodles and tinned products are fine if you have a way of transporting the packets and tins to a suitable disposal site.
When it comes to the snacks you take, I recommend you substitute chocolate with something like dates. Having a chocolate river running out of your pocket and down your leg is not a pleasant sensation!
Footwear
Light and airy does it. The footwear you choose should ideally be lightweight and comfortable and capable of repelling water for a reasonable period. On warm summer days, I tend to wear my Merrell Moab 2 mid boots when hiking. Not only do they let your feet breathe, they also have a Gore-Tex layer which, whilst not perfect, will keep my feet dry in the event that mother nature decides a month’s worth of rain on me in half an hour.
Feel free to discard the above advice if you are planning to tackle a mountainous region. Heavier, study of boots that provide excellent ankle support are an absolute must for anyone planning to go scrambling up significant peaks.
Take A Sweatband/Bandana
Time for a flashback to the 1980s and that classic story of dance in an American high school, Fame!! If you’re horrified by memories of pink leg warmers, spandex and big hair, fear not: we’ll be wearing none of those nonsenses. What I do recommend is that you pack is the sweatband.
A small piece of material that can be hung and tied around your neck, the sweatband is useful for wiping away perspiration that runs off your forehead and into your eyes. I know this take some of the fun out of your hike because you can no longer run around screaming, ‘I’m blind I am blind’, then wiping away the sweats and shouting, ‘It’s a miracle, I can see you again!’
This simple piece of gear is a great alternative to a hat for when the temperatures spike up and you don’t fancy wearing headgear. At this point, I just like to add that sometimes, no matter how uncomfortable it might seem, you really should consider protecting your head from the heat.
Salt in your eyes is no fun.
Underwear
Breathable underwear is key. Way back I used to hike in only be described as hungry underwear. It wasn’t until I joined the army that I discovered the pleasure of cycling shorts as an alternative to underwear. But cycling shorts can be uncomfortable, especially when travelling long distances as they have a habit of keeping sweat close to your body.
This can make your hike an unpleasant experience.
A few years ago, I discovered alternative underwear: Robert Pierre. And I was very pleased with them. But even though they dried fast there was no going away from the fact they hadn’t been designed to cope with real heat.
Last year I discovered Robert Pierre’s sports range and I love them. The combination of wicking, relatively high waistband and perforated gusset (the less said about that, the better) makes for an incredibly comfortable fit and experience.
I know there are a number of brands out there that have similar design features and the choice is down to you.
Plan Shorter Legs Between Waypoints
Hiking long distances is hard work. The problem with warmer climates is that we can be easily deceived as to how our bodies are performing. For most of you, I can imagine that being out and about on a warm sunny day is a far more but more pleasurable experience than humping your gear through a cold and wet. But don’t be deceived: not planning for all eventualities could be disastrous.
Your body is excellent at great you when it needs fuel and water. And it’s easy for us to attempt to override that feeling of those warnings when we’re trying to cover a set distance in a certain time. This is a dangerous process.
Rather than planning long and arduous legs along the route, make each one shorter and give yourself plenty of time to rest, eat and drink. Your body will thank you for it.
Set A Comfortable Pace
Set a fast pace and you’re going to sweat no matter where you are. In cold environments, it’s easier to build and maintain a good strong pace when you’re hiking. This isn’t always the case in warmer environments when you’re speed-walking under the gaze of the midday sun.
The pace you set should be brisk enough that you’re going to meet your daily mileage, but not too fast that you soon become a quivering, sweaty mess. For a start are you going to smell pretty unpleasant after a few days, possibly swamp-like. Secondly, you increase the risk of dehydration.
It’s fairly easy to work out if you’re walking pace is appropriate: simply more monitor perceived exertion versus the amount of perspiration.
Staying Healthy When Hiking In Hot Weather
Hot weather hiking is peppered with health concerns: heatstroke, dehydration, sunburn and cramps among the common injuries experienced.
Dehydration
Water is your lifeline. It’s a known fact that we can live without food for up to 2 months. Our bodies will fade and wither after only 3 days of not drinking water stop. Personally, I don’t think the Tutankhamun moon look is in the season, I prefer my skin to be a little bit old and crusty or desiccated.
This is important, and you should never be tempted even consider placing your water bottle anywhere not immediately to hand. The perfect location is in a water bottle carrier on the waistband of your backpack, or on a belt around the waist.
The side pockets of your backpack are not easily accessible. If you’re hiking alone, you’ll probably need to stop and remove your backpack to access your water bottle and it’s tempting to skip a water stop. At this point, the risk of dehydration becomes very real.
I’m not a great fan of Camelback. Aim to set that allows you to see how much water is left inside. This simple approach will give you a visual prompt of when you need to refill the container. Having a camelback tucked away inside your backpack doesn’t provide you with this facility.
In a temperate climate, you should aim to drink around half a litre of water per hour. As the temperature increases you need to up your intake accordingly.
Sings of dehydration:
- Headache
- Nausea
- Confusion
- Dry lips and mouth
- Dark urine
Going for a pee is a very accurate predictor of your hydration levels. If it’s not clear, you need water. Treating dehydration is easy if caught in the early stages:
- Drink plenty of water
Heatstroke
Imagine your body is a broken oven: the internal thermostat goes wild and everything inside starts to overcook. That’s not a nice thought. Heatstroke is serious and, when detected, requires immediate medical attention.
Signs of heatstroke include:
- Headache
- Disorientation and dizziness
- Nausea
- Confusion
- Unusually high core body temperature
When hiking in pairs pay close attention to your teammate and monitor for any signs of heatstroke.
Treatment for heatstroke:
- Strip the victim and attempt
to cool using cool water and fanning to lower the body temperature. - Rehydrate with water.
- Evacuate the casualty as
soon as possible.
Sunburn
Can you recall the first time you ever had sunburn? I’ll wager you don’t want to experience that feeling ever again. Protecting yourself from the cooking effect of the sun’s rays is an easy task, although you need to keep on top of your routine.
- Wear clothes that have a
certified SPF rating - Cover any exposed skin with sunscreen
(a minimum of SPF 30 for a hike of two hours, or more) - Apply the sunscreen about 30
minutes before exposure to the sun - Depending on your exertion
level and amount of sweat you produce, consider reapplying every hour, or so.
The only real treatment for sunburn is to cover the affected areas and allow your skin time to heal.
Other Considerations
Set A Comfortable Pace
Set a fast pace and you’re going to sweat no matter where you are. In cold environments, it’s easier to build and maintain a good strong pace when you’re hiking. This isn’t always the case in warmer environments when you’re speed walking under the gaze of the midday sun.
The pace you set should be brisk enough that you’re going to meet your daily mileage, but not too fast that you soon become a quivering, sweaty mess. For a start are you going to smell unpleasant after a few days, possibly swamp like. Secondly, you increase the risk of dehydration.
It’s easy to work out if you’re walking pace is appropriate: simply more monitor perceived exertion versus the amount of perspiration.
Avoid The Hottest Part Of The Day
Do you remember that advice your Gran used to give you? The one that went along the lines of, “stop picking your nose or you’ll scrape out your brain!” Oh, sorry not that one. My grandmother was a huge fan of the outdoors and spent many days and hours stomping around Dartmoor National Park. She always advised me to stay out of the midday sun.
Top advice: in particular, when your hikes and expeditions take you through into places where temperatures are abnormally high.
It’s relatively easy to plan around the hottest parts of the day. Factor a long stop, maybe a lunch break, into your walk and take a long break.
Hot Weather Hiking: What Next?
Hot weather hiking, like any expedition into extreme climates, might seem hazardous. With a little planning and some consideration for both your own tolerances and those of your fellow hikers, you’ll be just fine.
Wet weather hiking clothes
Let’s whip through this…
The most important consideration is to have a truly waterproof outer layer and choosing a waterproof jacket is a key part of your planning. Jake wrote a cracking review of the Rab Kinetic Alpine 2.0 jacket, an affordable shell layer that will keep you dry even in a torrential downpour (he tested the jacket during a seriously wet hike in Scotland, and it came through with flying colours). Whatever jacket you choose, make sure it has a wired peak that can be shaped to protect your face from driving rain (more tips how to choose a waterproof jacket here).
If you get wet, you run the risk of hypothermia in the cold.
Even getting soaked on a warm day can be a demoralising experience.
Likewise, you need to carry a pair of waterproof leggings.
Your footwear needs to be water-resistant. A pair of leather boots treated with a product like Nikwax’s waterproof spray will do just fine. If you’ve got little extra cash to spare, pick up a pair of GORE-TEX boots (here are a few thoughts on this for anyone with doubts: should you wear GORE-TEX boots for hiking?)
Avoid shoes. The high collar found on boots will reduce the risk of water getting at your feet. And grab a pair of gaiters for extra protection.
Summary
- buy a waterproof, NOT water-resistant shell layer;
- a peaked cap is key to keeping the rain out of your face;
- leather, or GORE-TEX, boots are essential to keep your feet dry;
- a pair of gaiters will provide extra protection from the rain.
Crossing a River
Picture the scene: your hike has taken you deep into the serene and beautiful hills. Ahead lie swathes of green grass, shimmering peaks and slashes of crystal blue water. But in no time at all the stunning view turns dim as the rains come and turns streams into wild torrents. Now you need to know how to cross a river.
On our travels there are times when we’ve found our route blocked by a river or significant body of water. Some organisations, think military, advocate only one way to cross these kinds of features: jump in with all your gear and swim across! Not one of the rules for hiking we recommend.
Crossing swollen rivers or large bodies of water can be hazardous. Following a storm or flood there is a real risk to life. Today we’re going to explore a number of methods you can use to move or reduce the risk that comes with crossing a water feature.
Walk Around The Water Obstacle
Sometimes this is the easiest method of avoiding getting wet. Walking around a water obstacle (a river, a lake, open lead, etc) will add some distance to your journey and you need to carefully consider the full length of your detour before making a decision.
As an example, and depending on the risk associated with the crossing, you might find it’s simpler just to cross the river. Adding 10 miles to your hike as you search for a shallow crossing point versus wading through one metre deep water doesn’t make sense.
Wade Through The Water
Every river you will ever come across will have both deep and shallow points. The key here is to find a point in the water or stretch of the river that is shallow enough for you to simply walk across whilst remaining safe. A word of caution: flowing water that reaches over waste height is a risk and shouldn’t be attempted if you’re hiking alone.
Here are a few points to consider before you and wade in:
- Strip off the bulk of your clothes. Wade through the water in your underwear and keep your mid and shell layers dry.
- Seal all your dry clothing in a dry bag (always, always pack your equipment inside a dry bag).
- If working in a group tie a piece of rope between the first person into the water and a second person. The latter will remain on the bank and act as an anchor point.
- Use your backpack as an emergency flotation aid (buoyancy can be achieved by inflating your dry bag and sealing it in a way that it holds a large volume of air inside)
- Wear a pair of trainers for the crossing. If you don’t have a spare set of footwear, then wade in your socks. Never wear your hiking boots to cross the river because wet footwear causes blisters (check out my guide on how to prevent blisters).
- Walking poles can be used to provide stability when crossing.
- Test the current before fully committing. If it feels too strong step back out and find another crossing point.
- Wear a minimal amount of clothing when you cross. Walking around in wet gear is not particularly pleasant and, in cold environments, there is a real risk of hypothermia.
Swim
Swimming across a water obstacle is one of those last resort methods. The time it takes to prepare and find a suitable crossing point is significantly longer than wading through a river. Swimming is also hard work and comes with additional hazards:
- Risk of drowning.
- Cold injuries.
- Water-borne diseases/parasites.
How to prepare to swim across the river:
- Test the current first. If it’s too strong, find another place to cross.
- Strip down as far as you’re comfortable and place your equipment inside the dry bag in your backpack.
- When sealing your dry bag trap as much air as possible inside so that it acts as a flotation aid.
- Secure your backpack to your wrist using one of the straps, or piece of rope. If you encounter difficulties, you won’t lose your flotation aid.
- After entering the water place one arm over your backpack, then use your legs and free arm to paddle your way to the far shores.
- Keep our strokes steady, don’t rush and definitely don’t stop.
- If at any point you feel the current is pulling away is too strong, turn around and head back to the point where you enter the water.
If you’re hiking in a small group a group use ropes attached to the swimmer and one person acting as an anchor point. This will allow you to haul back anyone running into difficulties during the crossing. Once on the far side, the first person can pull teammates across.
Make A Raft
This method works best when you have a group of hikers attempting to cross a river. It will also work for lone hikers carrying a large backpack. The idea is simple: use your backpack(s) as a makeshift raft.
Even if you’re a solo hiker and your ruck is large enough you can lie on it and scull your way across the river.
If hiking in a group you can lash a number of backpacks together to form a larger raft.
How to make a raft from two, or more, backpacks:
- Inflate and seal the dry bag in each backpack.
- Use the straps of each backpack straps to secure them together.
- Lash a rope between your makeshift raft and one person who will remain on shore an act as an anchor/safety. If you’re a lone hiker this doesn’t apply to you.
- Remove any clothing unnecessary clothing to prevent it from becoming soaked.
- Once the first person has crossed the first person who crosses then attaches a rope between themselves at the raft
- The person acting as the anchor point on the foreshore will now pull the raft back and make their way across.
The person who has just crossed the river can help by pulling the rope and drawing the raft across the river
Use A Bridge
Common sense tells us that at some point or another, every river will have a bridge over it. Finding one may not always be simple and there is a possibility you might have to add a significant number of extra miles to your hike in order to find a suitable bridge to cross.
No two bridges are made alike. What do you do when find one? Take a little bit of time to make sure it’s safe to cross. Here are a few suggestions:
- Visual assessment, does the bridge look safe to cross?
- Look for warning signs. In particular, anything that indicates the bridge is on safe to cross.
- If the structure looks rickety, test it. The last thing you want is to plunge through a rotten plank and plunge into the water polo.
- Move steadily across the bridge without stopping.
If you’re lucky enough to find a steady concrete bridge then disregard all the points above and strike out the far bank.
Did you find these tips useful? I’d be grateful if you could share this post and let everyone know how to cross a river. Back soon, happy trails.
That’s it!
We’ll expand this list of hiking tips and tricks over the coming weeks and months. For now, stay safe out there (and don’t forget to download the hiking plan PDF below). If you have any questions, just ask in the comments.


