Spot vs Garmin InReach: The Best Satellite Communicator
Intro
Before we get into this review, I thought you’d like to know that we’re in the process of writing a SPOT Gen 4 vs Inreach Mini comparison post. Jake and I have been playing with the SPOT Gen 4 to better understand its capabilities and how it stacks up against the InReach Mini (spoiler alert: the fourth generation SPOT GPS tracker still doesn’t beat Garmin’s products, but it’s still a lower cost alternative if you’re only after satellite tracking features with a few extra bells and whistles).
Want more options? Check out our list of the best satellite communicators and messengers of 2023.
Now, back to the main story…
Today we’re going to do something different. Instead of a simple GPS review (such as the eTrex 10), I’m going to put two of the best satellite messengers side by side. Ladies and gents, here’s an in-depth guide on the Spot vs Garmin InReach.
Garmin has been building quality GPS and Satnav devices since as far back as I can remember. My first GPS, an eTrex 10, is what could you reasonably call ‘bomb proof’. Honestly, it’s been lost in the deep Norwegian snow (and found by a skier who returned it to me), survived the jagged cold of the North Pole and even bounced down the side of a mountain. It’s scarred, but still going strong.
Exactly Which Satellite Messengers Will We Be Comparing?
Findmespot’s SPOT Gen 3 and the InReach Explorer +. Both are GPS devices, each with a similar set of core capabilities that we’ll look at in a minute (messages, emergency beacon, etc). Each device come in a range of models: the InReach Explorer, InReach SE and InReach mini. The SPOT and SPOT X (the latter being a miniature device comparable to the InReach mini).
SPOT Gen 3
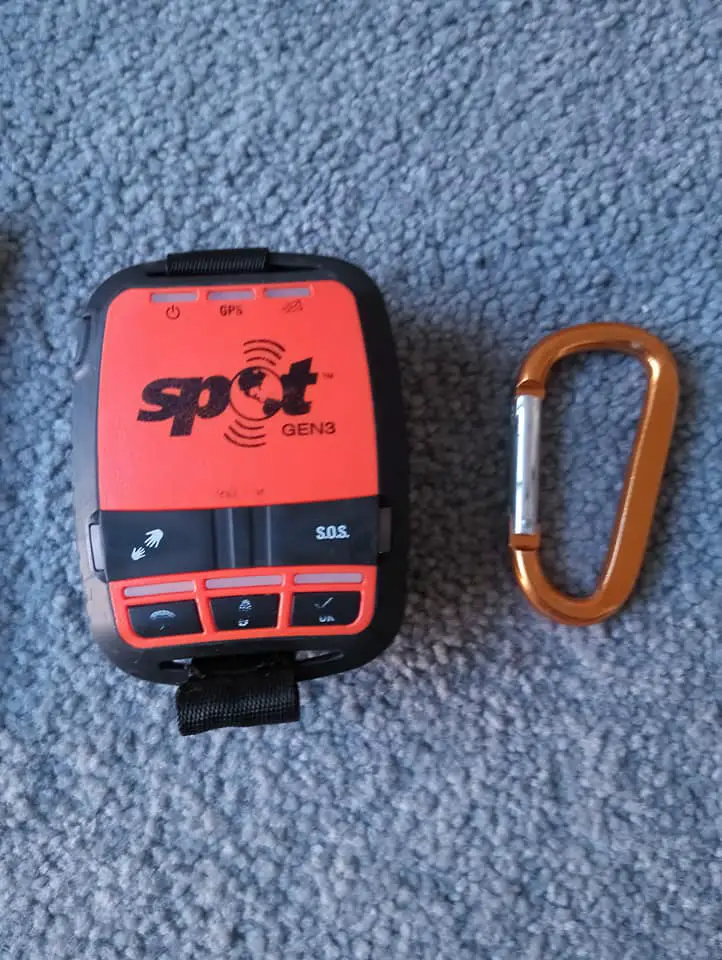
The Spot device is the one to consider if you’re trying to keep costs down. Simplicity is at the heart of the SPOT Gen3 Satellite GPS Messenger. What you get for your money is one of the best one-way communicators, with messaging and tracking services. And for the relative bargain-basement price of $150/£150.
We’ll do a direct comparison with the Garmin InReach shortly, but for now, let’s assume you want the basics and nothing more. This is exactly what you get with the SPOT. On the case are five buttons:
- Non-emergency pickup
- Emergency pickup (SOS) emergency beacon
- Tracking button that updates Garmin your location on mapping software such as Google Maps
- Check-in option that sends a pre-configured message to let your contacts know you’re okay
- A custom message that also sends a pre-configured message and includes your GPS coordinates.
That’s all there is to it.
No, you can’t send lengthy messages to friends and family. Nor can you let your social media followers directly follow your every step. If you want those functions, you’re going to have to pay a lot more money.
What I do like about the SPOT Gen 3 device is that it uses good, old-fashioned AAA batteries. Whilst some people prefer built-in power packs, for logistical and environmental reasons, the ability to swap out batteries is a plus point.
Standard Ni-Cad AAA batteries are relatively cheap and have a pretty long life. If you’re traveling in the extreme cold, you’ll need to buy lithium or carry a large supply of rechargeable cells. Regardless of your choice, AAA batteries have worked well – I’ve managed a maximum of 140 hours of tracking.
Like the InReach range of handheld GPS devices, you need to buy a plan. The most basic option costs $11.95/£11.95 per month. There’s also a $19.95/£19.95 activation fee. Garmin’s InReach plans are more complex and expensive (we’ll cover them in the next section).
Garmin InReach Explorer
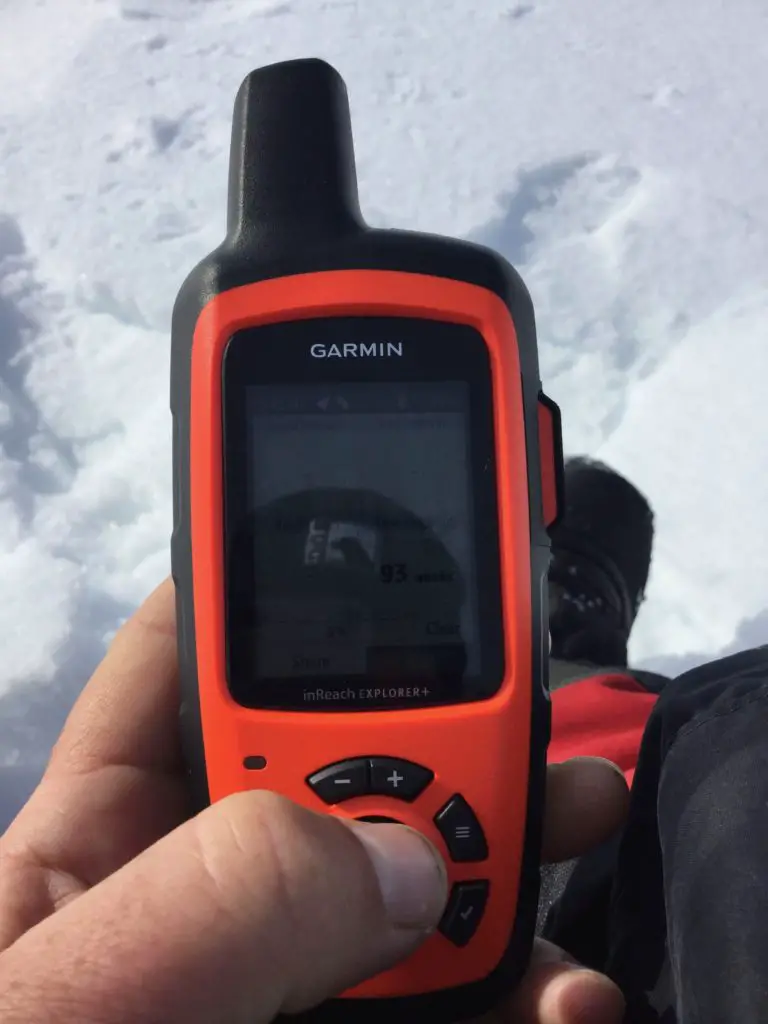
The InReach family of devices has been growing over the past few years. Originally manufactured by Dulorme, the company was bought out by Garmin in February 2016. I owned the original Explorer + and now own the Garmin-built version. Both make an great alternative to some of the best hiking GPS devices you can buy.
More expensive than the SPOT, the InReach has a huge selection of functions (as you’d expect). For me, the heart of the InReach is the ability to using the Iridium satellite network to send and receive messages. All these features come at a premium price of around $399/£399 (currently, the UK pound nearly at parity with dollars).
The chassis of the InReach has multiple buttons. I’ll go more in-depth in my upcoming Garmin InReach Explorer+ review. For now, the list below outlines a high-level description of the keys:
- Shortcut menu, accessed by clicking the lightning bolt key
- Menu access for currently open page, accessed by clicking the ‘three bars’ key
- Map zoom, using the plus and minus keys (Tip: download Open Maps to your Garmin before you head off on a hike, or expedition)
- Central pad is used to navigate the main menu system using the up/down and left/right arrows
It’s worth spending some time getting to know the InReach inside out. One feature I find incredibly useful is the weather report (a paid service) which, when combined with info from my Kestrel weather station, provides a detailed view of the shifts in weather patterns.
Garmin have opted for a built-in, rechargeable power pack. I have mixed feelings about this, the main question being, ‘how do I charge InReach whilst hiking?’ Taking something a decent power bank and solar panels is highly recommended, but only if there are enough daylight hours to charge your device. For shorter trips of a few days, a power bank alone is more than enough.
Several service plans exist for the InReach range of devices and, strangely, some of them are cheaper than those available for the SPOT (details in the table below). The basic offering – the Freedom Plan – will cost you $14.99/£14.99 per month.
How do the SPOT and InReach Perform?
I’ve used both on several expeditions and, in all honestly, they are both reliable devices. They deliver exactly what is advertised on the box – the key functions being location reporting, emergency messaging and waypoint tracking (the latter I used on my recent Lake Baikal traverse).
Garmin InReach Explorer+ at Amazon
Comparison Table
| Features | Garmin InReach | SPOT | Notes |
|---|---|---|---|
| Weight | |||
| Tracking confirmation | Yes | No | The InReach plays a little tune to confirm when a tracking point is sent. |
| Smartphone app | Yes | No | Again, Garmin give you multiple options for configuring and using your device. |
| Service Plan Price | Top end: $35+/£35+ per month | Top end: $310/£310 per year | Depending on your needs, you can save a lot of money using Garmin's Freedom Plan. |
| Pre-set messages | A lot! | 3 | The InReach wins hands down here. Having the option to build pre-set messages before your start you trip means less time typing when your fingers are cold and numb. |
| Power output | 1.6W | 0.4W | Some reports suggest the SPOT's low power output can result in failure to transmit waypoints. |
| Network provider | Iridium | Globalstar | Iridium is the only satellite network with truly global coverage. |
| Display | Yes | No | Garmin's InReach is controlled and configured by the menu system. |
| Custom messages | Yes | No | This is just like sending text messages on your phone. |
| Cost | $270/£270 | $150/£150 | Note: consider what functions you need. |
| Battery type | Built-in, rechargeable | 4 x AAA (removable) batteries. | For best performance from your SPOT, use lithium cells. |
| Battery life | Advertised: up to 100 hours | Advertised: up to 150 hours | Note: I've never seen either device live up to the promise, although both am pretty close. |
| 2-way messaging | Yes | No | Allows you to 'chat' in the same way as you would when texting. Useful for emergency pickup or constant sitreps. |
SPOT Gen 3 Pros
- At 4.6 ounces it’s the lightweight option of the two (Garmin’s InReach is a slightly heavier 6.8 ounces).
- The SPOT Gen 3 device costs less than the InReach. If you look around you can find some great deals on eBay and Facebook.
- For the most part SPOT’s service plan is cheaper than Garmin’s. Costs can rise and fall depending on how much usage you demand from the device.
- Long battery life. Some reports claim up to 150 hours of life before a battery change is required. I’ve never be able to replicate this figure (just under 140 hours for me).
- No requirement for additional power supplies such as solar chargers. The three AAA cells that power the SPOT are easily swapped out when discharged.
Garmin InReach Pros
- All Garmin devices have two-way communications, which can be incredibly useful and important if you’re in an emergency. The ability to pass messages back and forth allows you to notify emergency services of your circumstances.
- The service plans for the InReach are far cheaper than those of Iridium’s satellite phones, but you still have access to two-way satellite communicators. If you’re unsure, ask the sales team to explain each plan.
- Less chance of ‘dropped’ waypoint transmission than the SPOT. The 1.6W transmission power of the InReach gives a greater chance of successful transmission. I’ve noticed that not all SPOT transmits have succeeded.
- Weather reports. A brilliant and useful feature I’ve used many times.
- Whenever you send a tracking point the device will notify you the data has been transmitted via a slightly high-pitched, irritating chirp.
- Smartphone integration makes looking up contacts, typing and sending messages a breeze. You can use the InReach’s menu to do the same, but it’s incredibly fiddly – and difficult when your fingers are numb.
- The Garmin Freedom plan, if used right, can work out cheaper than the SPOT plans.
- Iridium’s satellite network is larger has near-complete global coverage and, in my experience, is more reliable than GlobalStar (used by the SPOT)
Garmin InReach vs SPOT: Which is best?
For sheer functionality, the Garmin outpaces the SPOT by a wide margin. Although the latter is meant to a simple device providing minimal functionality, it’s a little too simple for my liking. Features such as two-way messaging, weather reports and confirmation of sent tracking points are must-haves for any my long-distance hikes or expeditions.
Yes, the InReach is more expensive and many of the plans are far from cheap it’s a small price to pay. Having a reliable GPS and satellite communicator gives you a warm fuzzy feeling – a sense that your back is covered, even when you’re roaming far from civilisation – is worth every penny.
That said, if you’re happy with the bare essentials then the SPOT will, well, hit the spot. Most important of all: carrying a SPOT is still better than having nothing at all.
How To Best Use Each Messenger: Tips and Tricks
Now the Garmin InReach/SPOT debate is over, here are some tips and tricks that will help you get the most out of whichever satellite messenger, and plan, you choose for your hikes and expeditions.
Route Planning
Scouts learn how to read maps. They also learn how to create a route plan. Take some lessons from scouts and create a route plan in Word or write it down and leave with a responsible person.
Convert your plan into a digital route and make it publicly available on Earthmate, or via Garmin’s sharing funtion.
Test Your Equipment Before You Leave
Testing ahead of your trip is vital. Not only do you need to ensure your device works, but that your emergency contact understands the various message meanings and corresponding procedures/responses.
Consider the following tests to be most important:
- Waypoint registration. Send a couple of waypoint pings and check they have registered on the mapping software you’re using.
- Send test emergency messages and ensure your nominated contacts receive them.
- Test your two-way messaging (Garmin only). If your emergency contact is unable to receive, or reply to, your messages then you have a problem. Test, test and test again.
- Battery life. This isn’t so important for the SPOT as you’ll be carrying spare AAA batteries. Test your InReach’s battery life by turning on the device and leaving it transmitting waypoints for up to 10 hours. Then check the remaining charge to get an understanding of how fast the battery drains. This will give you an idea of how often you’ll need to charge the InReach when out in the wilds.
Agree Emergency Message Meanings
- Agree on pre-configured and custom messages and responses. Your emergency contact needs to understand the meaning of any messages you might send them, plus the actions on receiving a given message.
- Consider what your emergency contact will do if they don’t see any track points for a specified period. Have a ‘window’ e.g. one day, after which they will initiate the agreed emergency actions.
- Ensure you have a plan if no tracking points are ever transmitted. This might include meeting at a designated emergency pickup or calling rescue services.
Track Your Route
- Track every stage of your journey. Both the SPOT and Garmin InReach allow you to configure time intervals at which your tracking points are sent. I recommend hourly ‘pings’.
- Always leave your tracking function on, you might forget to turn it back on (something I was guilty of on my crossing of Greenland).
- Place your device in the optimal position when in tracking mode. It’s tempting to think that technology has no limits, but even positioning can have a dramatic effect on the ability of either device to successfully transmit a message.
- The Garmin’s antenna should have a clear view of the sky, unobscured by clothing or equipment.
- SPOTs should be positioned so that the face of the device points towards the sky. This is not easy to achieve and may be one of the contributing factors to the periodic failure of tracking point transmissions.
General Tips
- Keep it clean! Dirt and grit have a habit of finding their way into the smallest nooks and crannies. Remove foreign objects as soon and often as possible to prevent the causing damage to you SPOT or InReach or jamming the keys.
- Backup and remove waypoints from previous routes. Having thousands of tracks might look good but can also lead to confusion and difficulty when attempting to navigate between waypoints.
- Always make your waypoints and tracking points available via a publicly accessible website like Garmin’s Map Share (you’ll need to sign up for this service). Inside the system you can choose who to share your personal tracking URL with (perfect for the privacy conscious hiker).
- Understand you service plan. Every message you send has to be paid for, so you really need to know the ins and outs of the plan you’ve bought. Breach your messaging limit and you’ll soon find that the on-demand pricing model could leave you with a hefty bill.
What About the Bivy Stick Satellite Communicator and InReach Mini?
The Bivy Stick and InReach Mini are good alternatives to both the SPOT and Explorer. We’ll be writing up a review of each and comparison guides soon.
How To Power these Messengers
This is a subjective topic. Everyone has their own views and preferences as to which gear they use for charging devices whilst exploring the great outdoors. To be honest, many charging systems have reached parity in terms of capacity and supported devices. Put simply: as you understand the specific power demands of your GPS messenger you won’t have an issue finding a suitable charging system.
My own experiences in extreme environments are summed up by the list of recommended gear below. Some of the equipment is from UK manufacturers (e.g. https://mobilesolarchargers.co.uk. The owner, Tim, is a bit of a charging guru and actively participates in the designing of the panels, power banks and other utilities). Other recommendations are available globally via Amazon.
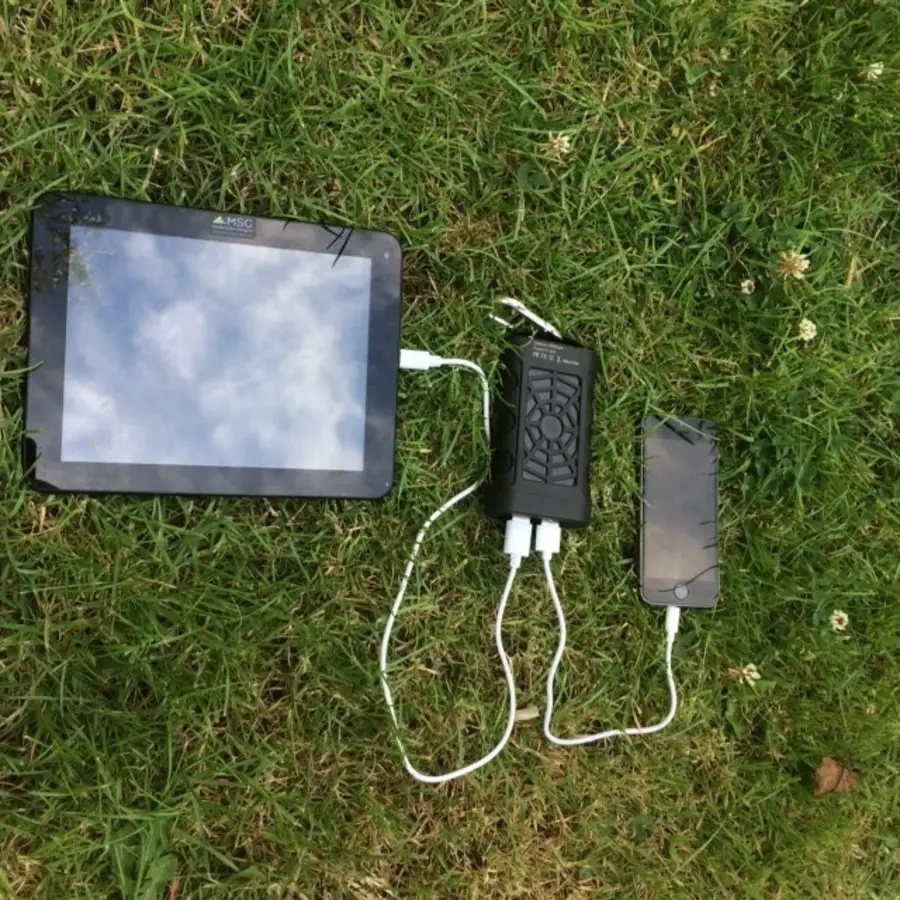
Aqua Trek USB Power Bank
The Aqua Trek is an awesome power bank, that I’ve been using for about three years now. In 2017, Tim kindly donated one of the units for me to test on my crossing of Greenland. It was an early model and problems were anticipated (which is why I took several different power banks).
Amazingly, the Aqua Trek performed beyond my expectations. Charging from one of MSC’s 20W folding solar panels took only a few hours. Once the power back was charged, I got four full charges on my iPhone 8.
Inside the front panel are several outlets which, between them, provide charging for just about any device you can name (apart from Apple products – you’ll need to use the USB adaptor that comes supplied with the Aqua Trek)
It’s hard to find fault with this power bank. Sure, it’s a little pricier than some of the off the shelf offering, but it’s been designed to thrive in extreme environments – and it does, with ease.
And the built-in flashlight is a really useful feature.
Aqua Trek Technical Specifications
· 10000mAh LG battery capacity
· Input DC 5v / 2A
· USB Output at 5v/3A, QC : 9v/2A, 12v/1.5A
· Cycle life > 500 full charge/discharges
· Charge time 5 hours
· Dimensions: 120 x 68 x 28 mm
· Weight: 230g
· Temperature range -10 to + 40C
Note: I’ve used this power bank at temperatures as low as -30C and never had any problems.
Jackery Bolt 6000 mAh USB Battery
The Jackery Bolt was one of my not-so-successful experimentation devices. I took it on a trip across Norway about two years ago. The intention was to discover if it could handle the same extremes as the Aqua Trek. It didn’t, charging erratically at temperatures of -20C and below.
In all fairness, Jackery doesn’t market this as a power bank for the extremes. And to give the Jackery its dues, it’s ideal for temperate climates.
What I do like about the Jackery Bolt is that it’s super-compact – the unit fits comfortably in the palm of my hand. And the fact the Jackery has a built-in Lightning cable for Apple devices is a big plus point.
Jackery Bolt Technical Specifications
- 6000mAh battery capacity
- Input DC 5V 2A
- Output (minimum) 20mA~160mA
- Cycle life > 500 full charge/discharges
- Charge time 4 hours
- Dimensions: 96.5*79.1*21.6mm
- Weight: 170g
- Temperature range -10 to + 40C
Anker PowerCore 20100
Anker’s PowerCore 20100 is a more recent addition to my collection of power banks. To my mind it’s a huge leap from some of the other less intelligent devices available to buy. More important, it’s a low-cost option that’s ideal for the frugal hiker.
Like the Jackery, the PowerCore 20100 is not intended to be used in cold climates. Charging time is slower than I’d like: up to 10 hours to reach full capacity, which is a problem is you’re in low light conditions or travelling in winter when daylight hours are short.
Charging capacity is pretty good – Anker quote 7 charges of an iPhone 7. The PowerCore 20100 gave me just under 6 full charges of my iPhone 8 Plus. Not too bad.
Anker PowerCore 20100 Technical Specifications
- 20100 mAh battery capacity
- Input DC 5V 2A
- Output 5V 4.8A
- Charge time up to 10 hours
- Dimensions: 166 x 62 x 22mm
- Weight: 350.20g
- Temperature range no official stats, but -10C drained this power bank fast
Anker PowerCore 20100 at Amazon
Solar Charging Equipment for Your Satellite Messenger
For me, there is only one option: the MSC range of solar panels.
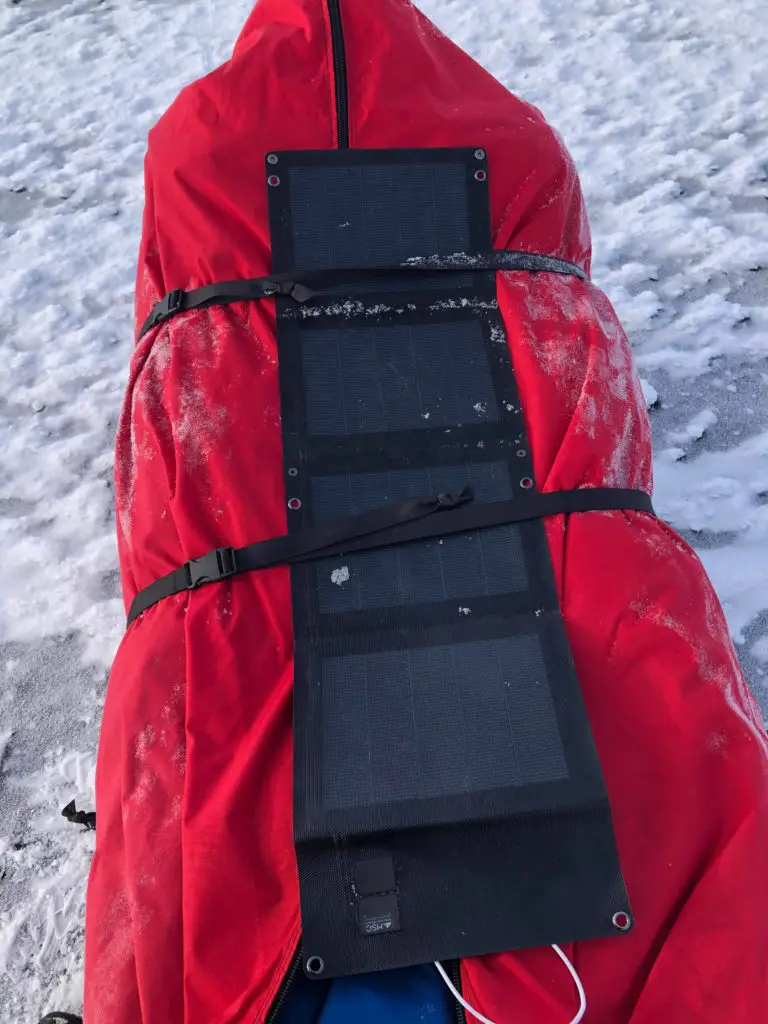
MSC Expedition
I’ve tested military grade solar panels, but these had a major drawback: they don’t play well with commercial equipment. A US company supplied me with some trial solar panels as sponsorship for my ski across Greenland. The equipment came with a word of warning: do not charge direct to your iPhone, or satellite communications devices, as their storage capacity can be damaged.
My all-time favourite is the MSC Expedition. At 389g it’s lightweight. More important is that the panels are wired in parallel, which means you can still charge even if the wiring between panels is damaged.
MSC Expedition Panel Technical Specifications
- Solar peak power: 20w
- Peak Output DC 2 x USB: 5v/4A
- 20W Size Folded/Open: 200/890 x 270/270 x 10/6 mm
- Weight 20w: 368g
SPOT vs Garmin InReach: Final Thoughts
Satellite Messengers are pretty much a standard addition to your packing list. Both the InReach and SPOT will be useful if you find yourself in a tight spot. But what you do need to understand is that each has limitations. Read this post, trawl through the user manual and get to really know whichever device you choose to buy.
Most important of all, have a comprehensive plan that details your route and actions on given scenarios.
I hope this SPOT vs Garmin InReach comparison has been useful. Please do share on social media, or link to it if you have a blog.