Osprey Atmos 65 Review

Introducing the Osprey Atmos 65
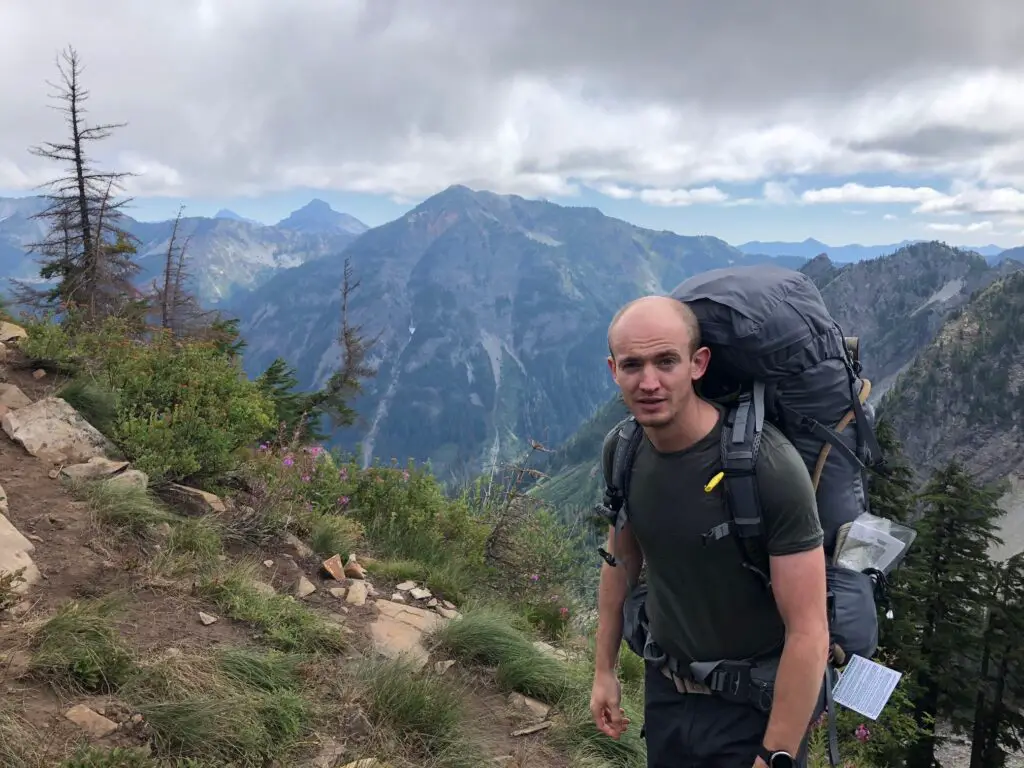
My Atmos 65 was both a very last-minute and, as it turned out, a very fortunate purchase.
Back in 2018 when I went to Seattle to spend a few days hiking Section J of the Pacific Crest Trail, the rucksack I had taken with me was a Vango Contour 60+10; a decent but by no means top-end piece of kit that had served me fairly well on a rainy three days wild camping in Scotland but which I was becoming increasingly nervous about using. I could ignore most of its (myriad) flaws but the one thing I couldn’t ignore was that what must have been a one-off construction fault meant that the shoulder adjustment strap on one side would always end up digging into my neck, no matter how much I tried to move it.
I kept trying to pretend it wouldn’t be an issue but, with the bag completely packed and 24 hours to go before we left our motel and headed for the trailhead, I finally accepted that this tiny problem had the potential to ruin my week. And so the Vango came to an unceremonious end in a dumpster round the back of the motel, and I made a dash to a nearby REI. Since the ‘buy cheap buy twice’ adage had been irritatingly well-demonstrated, I decided that this time I’d go for the best backpack money can buy (or at least the best that it could buy on-the-spot in that particular REI) and that pretty much meant it had to be an Osprey. Since I knew that my Vango had a maximum possible capacity of about 70l (though it wasn’t completely full) I was working in the 60-70l ballpark, so the Osprey Atmos 65 pretty quickly became the obvious purchase. And an excellent choice it turned out to be; five days on the trail proving comprehensively that, even if it hadn’t been for the issue with the Vango’s strap, the Atmos made for a far more comfortable pack all-round. I ended up being very grateful for that flaw in the Vango, as otherwise I’d probably have used it for the week and just not been half as comfortable or happy as I ended up being with the Osprey.
Now that I’ve had it for a couple of years and used it in a range of different scenarios, it seems like a good time to finally write what I hope will be the definitive Osprey Atmos 65 review!

Atmos 65 Overview
Where it fits in the range
You can’t really review any item of gear without understanding how it fits into the wider range (hence my rather, um, OCD post about Rab sleeping bags in which I made a diagram of the whole range). So, let’s start off by looking at how the Atmos 65 compares to other items in the Osprey men’s backpack range. For this purpose I’m going to look at the most similarly-sized backpack in each sub-brand, for fair comparison, and I’m ignoring any of the ranges that only have smaller sizes as they’re not relevant. I’m also going to leave out the Xenith, a serious expedition pack that starts at 75l, as it’s just not really designed for the same use-cases as the Atmos.
| Pack | Weight | Cost | Comment |
| Atmos AG 65 | 2,200g | £200 | Removable lidAdjustable hip-belt‘Anti-gravity’ load-bearing system. |
| Kestrel 68 | 1,800g | £160 | On the face of it, lighter, cheaper and larger – but the trade-off is less fully-featured. It does have a front-panel suitcase-style opening. |
| Rook 65 | 1,600g | £130 | Much more bare-bones and minimalist |
| Exos 58 | 1,200g | £160 | Even allowing for the smaller capacity, a very lightweight pack, but made of less robust material. |
| Aether AG 60 | 2,300g | £210 | ‘Anti-gravity’ load-bearing system. Side access. |
| Aether Pro 70 | 1,800g | £300 | A very light (for the capacity), more stripped-down version of the Aether, for serious expeditions. |
| Levity 60 | 900g | £200 | Extremely light and minimalist. |
To be clear, this simplistic table only tells part of the story because there is so much variation in the exact features that each pack has, not to mention that some packs will simply be more comfortable for some people. But, fundamentally, the Atmos 65 occupies a position at the more expensive, fully-featured, but heavier end of Osprey’s range. In my view, the features make it good for wild-camping where kit organisation is particularly important, and the size is more than adequate for several days on the trail in all but the worst weather, but weight will obviously be a consideration especially for smaller people or very lengthy hikes.
Osprey Atmos 65 dimensions and weight
As mentioned above, the Osprey Atmos 64 is one of the heavier packs at 2.2kg. It’s 87cm long (or tall, I guess you’d say) and 39x47cm wide/deep. This makes it a bit larger than some of the more pared-back packs, and it is certainly taller, although this suits me well being quite tall myself.
Materials and Construction
The pack is made from 100D x 630D nylon dobby. What on earth does this mean, you ask? Well, dobby is a pattern of weaving that alternates lighter thread (the 100 denier) with heavier (the 630 denier). This keeps the material strong, but also light, and creates a mesh of stronger fabric that prevents small punctures from turning into rips or tears. The end result is a pretty robust backpack that you needn’t worry overly about damaging from bumps, scratches, thorns, sharp rocks, or even sharp items shoved carelessly inside the pack.
One of the key benefits of the Atmos (and the reason it is often listed as the Atmos AG), is that it is constructed using the Osprey Antigravity system. This uses a semi-rigid lumbar support and hip-belt, integrated into the straps and overall harness structure, to allow heavy loads to be distributed onto the hips and therefore feel lighter and easier to carry. Although I haven’t done a direct comparison of identical weights over identical distances, there’s no doubt that the Osprey Atmos is a remarkably comfortable pack even when carrying upwards of 15kg over highly mountainous terrain.
The pack is also designed with a curved back and a mesh, that creates an air gap between your back and the backpack, keeping it significantly cooler and helping to reduce rubbing points and other areas of discomfort. Even the hipbelt is ventilated. For someone used to military packs (which have none of this stuff) and the Vango, this was the most immediately noticeable feature and it really does make a huge difference, especially when walking in the heat.
It’s these features that make the Atmos especially suitable for carrying heavy loads in hotter conditions, in spite of the higher base weight and cost of the pack.
Crucially, the back and hipbelt are also fully adjustable, although I wouldn’t say this is completely intuitive to do yourself. Osprey do provide an app, which I have not tried, and some resellers will do the fit for you although personally I didn’t feel that the member of staff in REI really knew what he was doing sufficiently to get a better fit than I could get for myself.
Osprey Atmos 65 Features
Well, we described the Osprey Atmos as ‘fully-featured’ so let’s get into some of the nitty gritty of what features I’m actually talking about.
Removable, free-floating top lid
One of the unusual features of the Atmos range is the ability to completely remove the top-lid, saving a little bit of weight (185g, according to my kitchen scales – putting the pack down to just over 2kg). This is done very easily with two clips at the back of the backpack, so it’s extremely quick to make the change and, in the place of the lid, there is a very simple flap closure. On the one hand, this is a great feature – allowing you to shave a bit of weight off and get rid of some bulk and unnecessary pouches and straps – on the other hand I can’t help feeling that if you’re that worried about 185g, why would you have chosen a 2.2kg pack in the first place? I think, realistically, this option is less about rigorous weight-saving and more appealing to someone who just wants to simplify their pack when they’re carrying a bit less kit, and avoid pouches that they’re either not using, or would be tempted to fill with stuff.
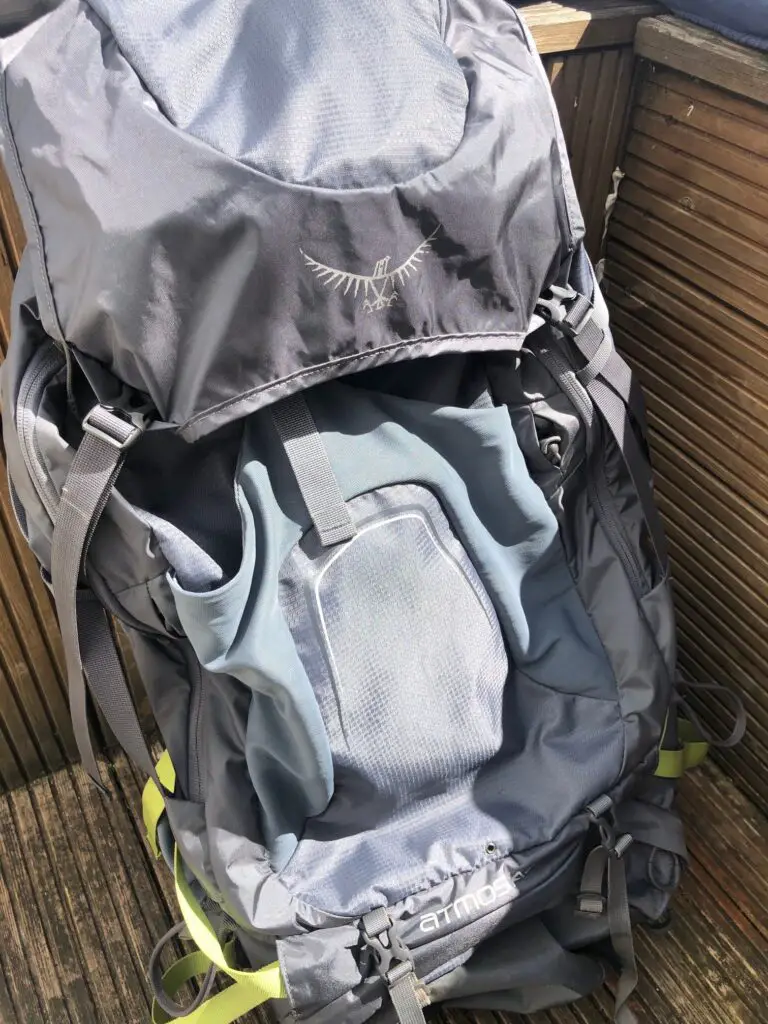
For when you are using the lid, it’s undeniably a handy addition with two very roomy pockets, ideal for keeping a rain cover or other bits and pieces you need ready access to. It stretches nicely down over the pack, and is free-floating (i.e. attached to adjustable straps at both back and front) so it can still fit neatly even if the spindrift collar is fully extended and you’re using every inch of available space.
Front access
Unlike several of the Osprey packs, the Atmos does not have full-width front-opening, with the main access being from the top. On the one hand this can make it a little harder to see and access all your kit at once, but it does save on weight and reduce an obvious point of failure – a full-width-opening backpack with a broken zip could potentially be rendered almost unusable. It does, however, like most backpacks of this size have a small front-facing opening at the bottom of the backpack. This bottom compartment, generally used for a sleeping bag, can be separated off from the main body, or the flap between the two can be detached, making for one long compartment with access at either end. This works perfectly well as a compromise, especially if you pack carefully and give thought to where every item will sit, and how you will access it.
Pouches
The pack has two roomy zipped side-pouches although it’s worth bearing in mind that the body of these goes inwards into the body of the pack, so they essentially share space with the main compartment. This means that while they have plenty of capacity when the pack is empty, they can become significantly more cramped when the pack is full. Despite that, they’re a useful way to segregate items; on the PCT I always used one for my ‘lavatory kit’ of trowel, TP and hand sanitiser, while the other was just about the right size for my jetboil and ‘brew kit’, keeping it easily accessible for any quick stops.
At the bottom of the pack are two open-topped stretch side pouches which are primarily designed for water-bottles, although I ended up using one for our map most of the time. Cleverly, they have two openings so the bottles can be held upright, or angled forwards. They could also hold spare clothes like a hat or gloves but they’re probably not secure enough that I would put anything too essential in them.
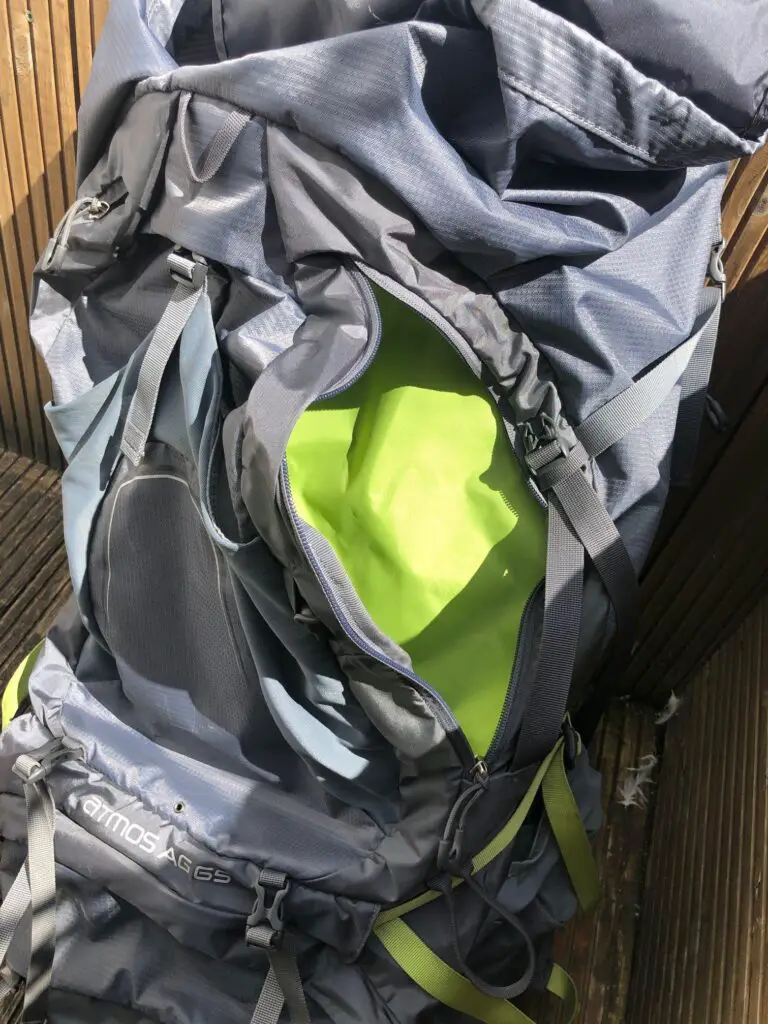
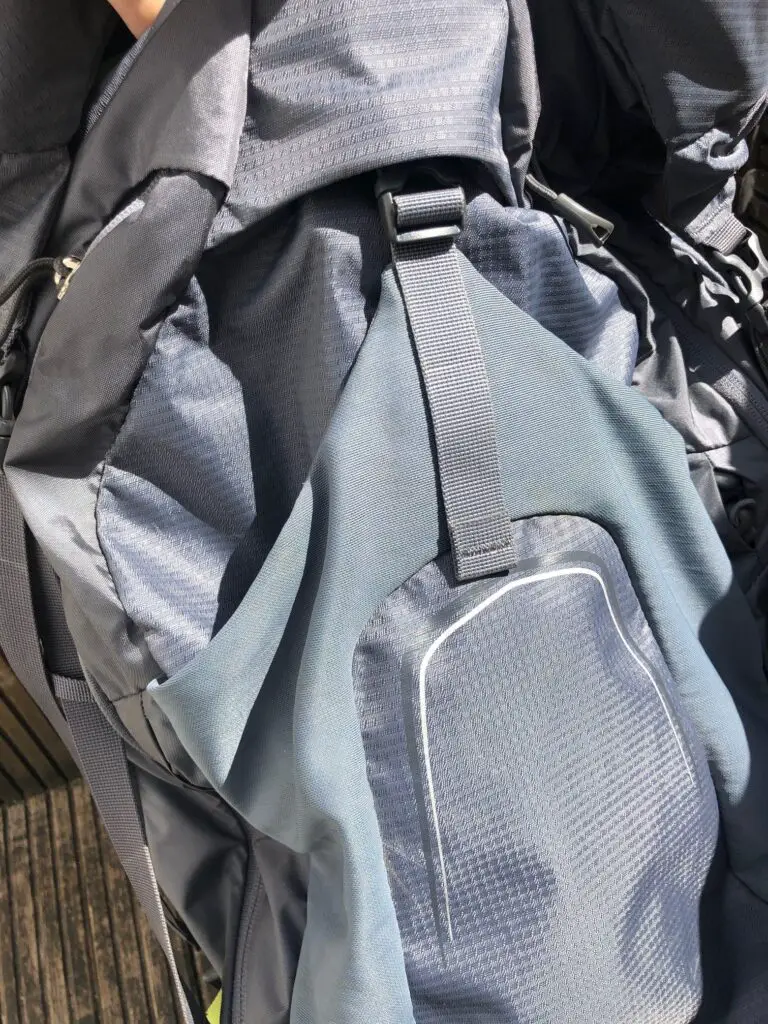
One of my favourite features is the large stretchy compartment across the whole of the front of the pack, which can be secured with a clip at the top. This works perfectly to hold a raincoat and other wet kit – keeping potentially soggy items away from everything else in your bag, and also making it easy to quickly grab waterproof kit and then put it away again when dealing with off-and-on showers. On the PCT I often ended up using this for my camelbak. Although the Atmos has inbuilt space for a hydration system, and routing options, having the camelbak on the outside made it quicker and easier to refill it when we stopped at lakes and streams.
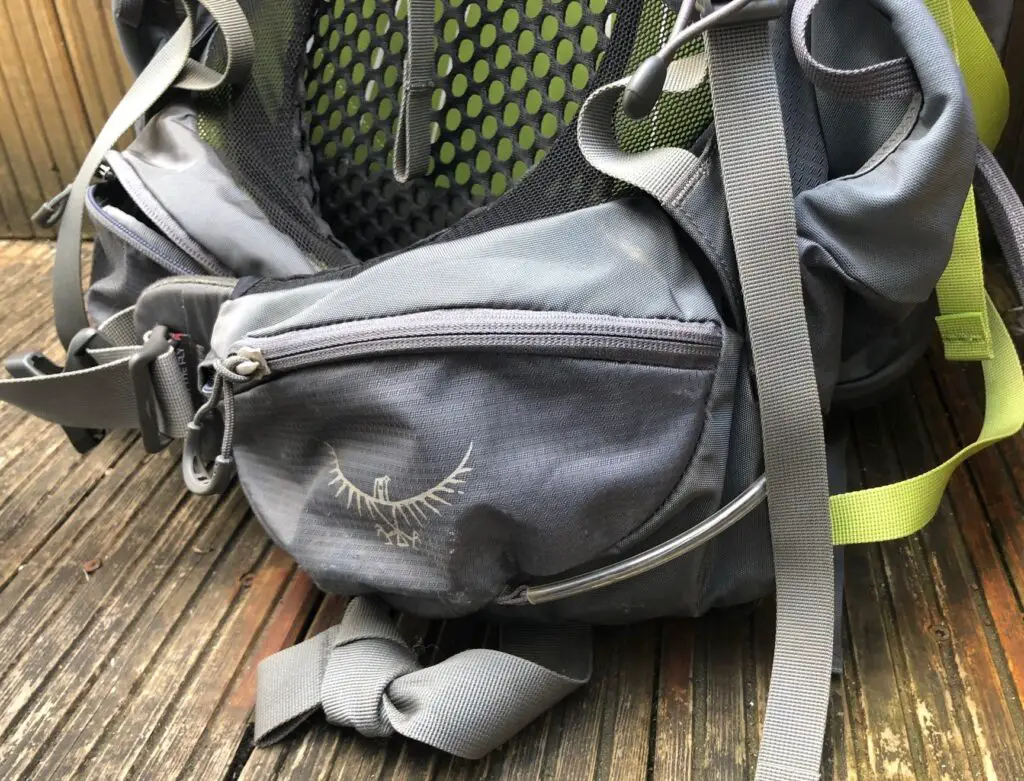
Finally, there is one sizeable zip compartment on each hip – good locations for a small first aid kit, snacks, or a phone or camera.
Overall, the pockets are thoughtfully-designed so that it’s easy to organise your kit, both when on the move and in-camp. I’m a real sucker for a well-organised rucksack with everything in its place (blame military training I guess) so this appeals to me. The trade-off is, of course, a certain amount of additional weight.
Trekking pole holder
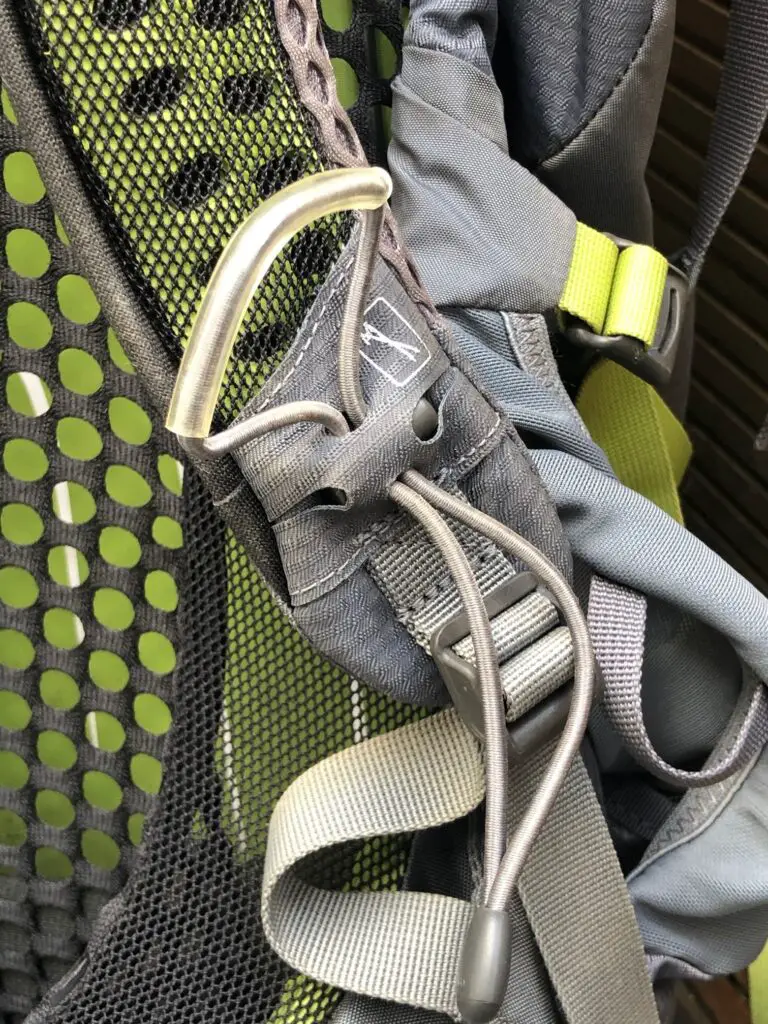
One of the features of the backpack is the trekking pole holder, designed so you can quickly secure your trekking poles, and then get them back again, without having to remove your pack. The holder is pretty straightforward and consists of two parts; a loop of plastic-covered webbing below the left hip pouch, and a piece of elastic, again with a section protected by plastic, on the left shoulder-strap, at around chest height. Quite simply, the poles are put into the hip loop to keep them out of the way, and then secured in place with the chest loop. It’s a neat and tidy solution, and very handy indeed.
Hydration sleeve
As mentioned above, the Atmos AG is fully set up to use a camelbak or other hydration system. In the main compartment, against your back, is an elastic-topped sleeve to put the bladder in, keeping it flat and upright and separate from the rest of your kit. A gap in the centre of the pack, roughly level with the wearer’s shoulder-blades, allows the drinking tube to come out and it can then be routed over either the left or right shoulder. As I said, I ended up mostly putting my camelbak on the outside of the pack, in the back compartment, and this solution worked well for me but there’s nothing at all wrong with the purpose-designed set-up and in the end it’ll come down to your preference, the size of your hydration system, and how often you need to stop and refill it.
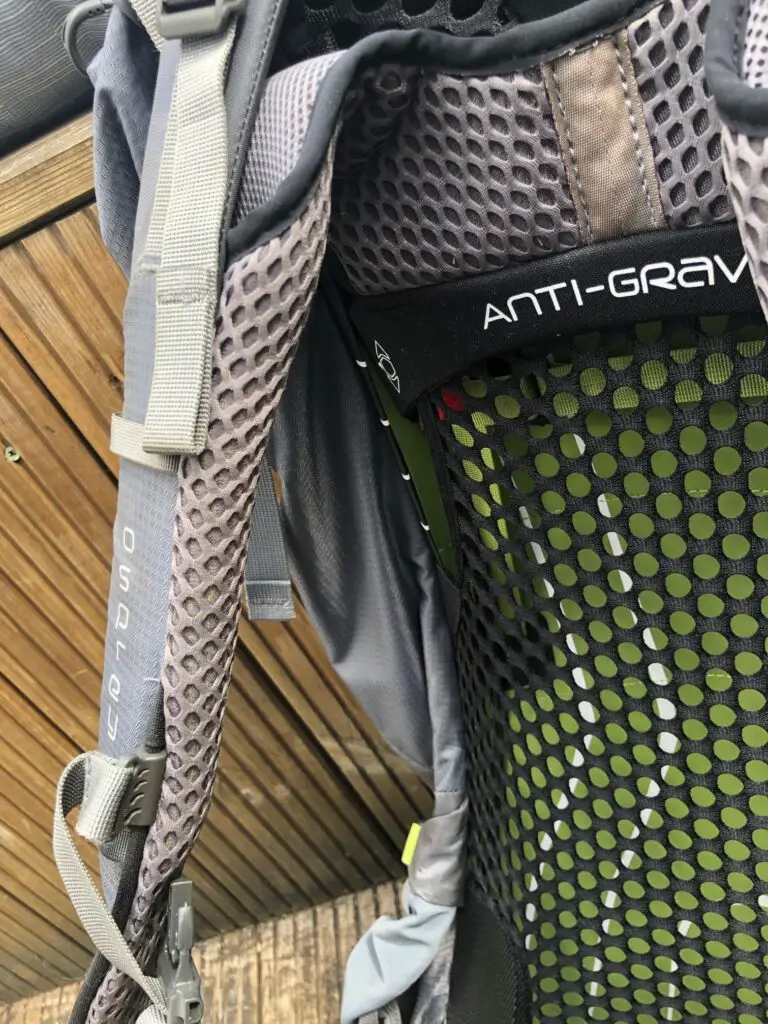
Hip belt
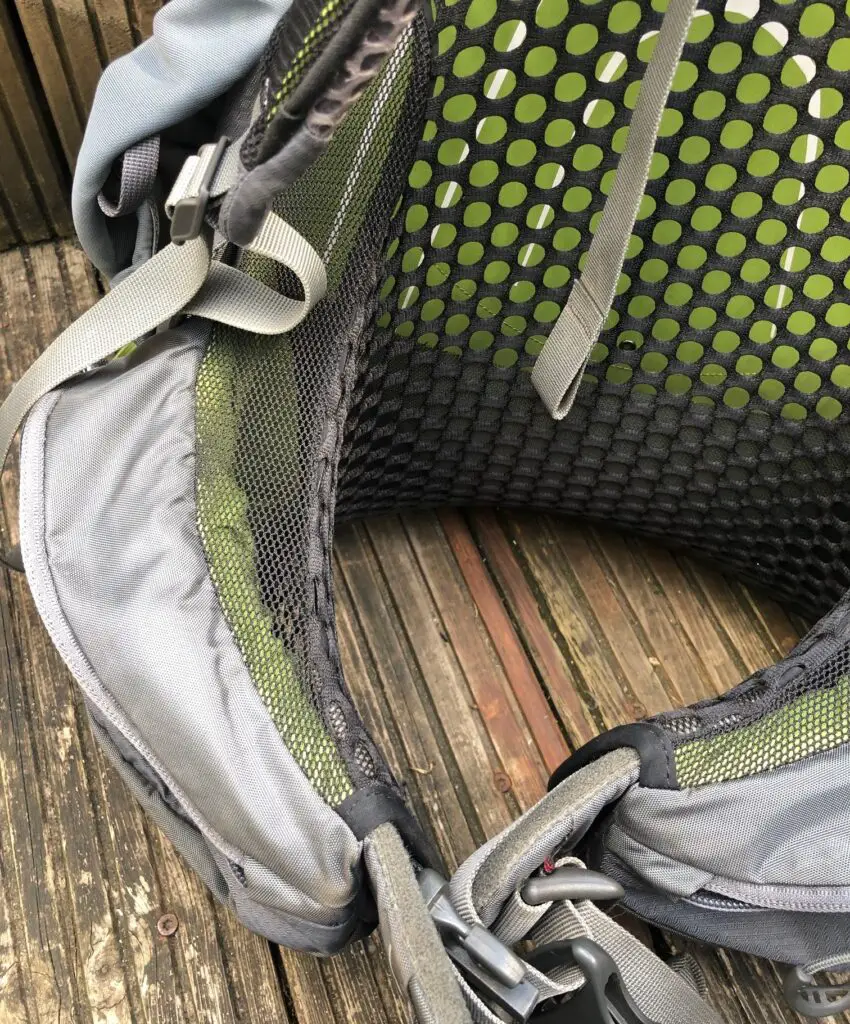
The hip belt on the Atmos AG 65 is pretty remarkable in many ways. Firstly, it is semi-rigid but fully adjustable, not simply by tightening straps but by being able to reposition the rigid sections so that it sits nicely on the hips but does not come too far around the front. It’s also integrated into the supportive, stretchy mesh that makes up most of the back of the backpack, so that most of the back and much of the hip belt is not actually in direct contact with the body, but separated by the mesh and an air gap to allow for ventilation and reduce pressure-points or discomfort.
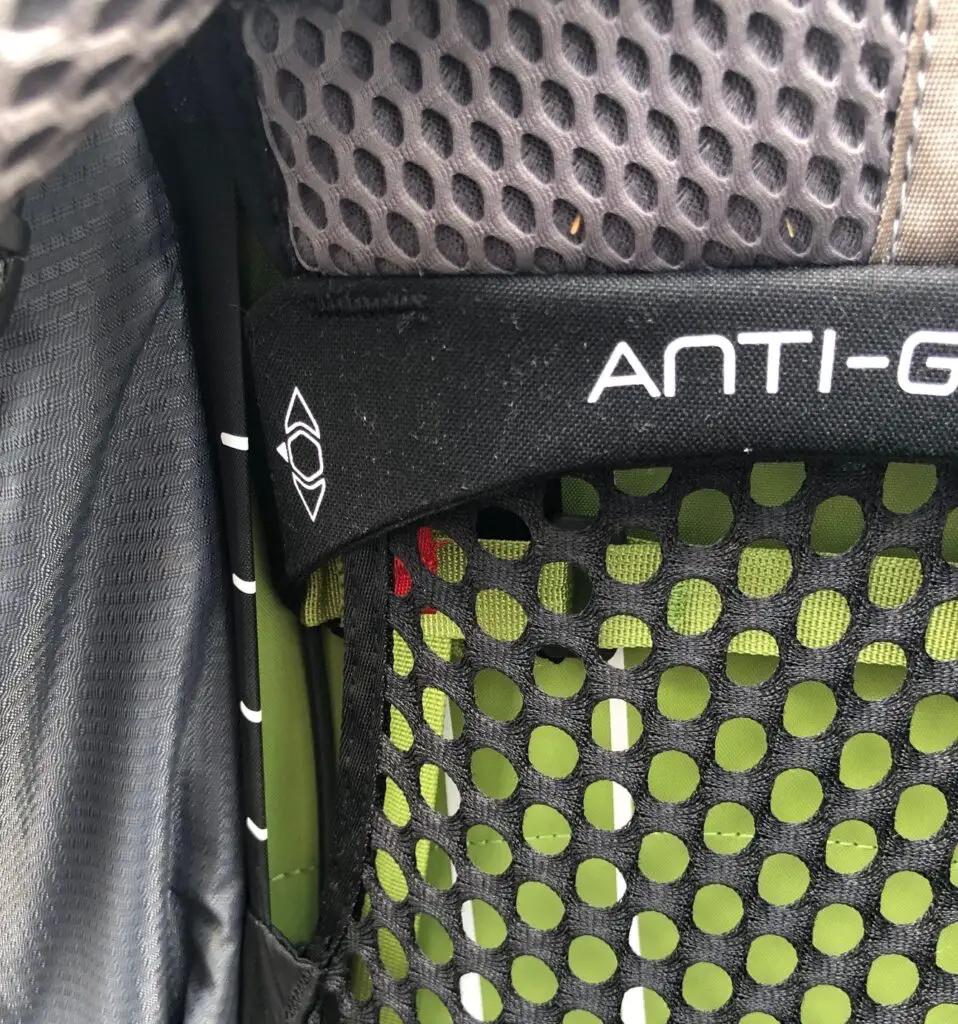
Adjusting the Osprey Atmos 65
The Atmos has a fully adjustable back. What this means in practice is that the mounting point for the shoulder harness can be moved completely up and down, thereby changing the distance between the tops of the shoulder harness and the hip belt, obviously to suit peoples very different torso heights. This means that the bag can, and should, always ride comfortable on the hips regardless of how tall or short you are, an effect that cannot be achieved by any amount of tightening or loosening straps on a conventional backpack with immovable shoulder straps.
The way to make adjustments is as follows:
- Behind the top of the shoulder straps will be the ‘Anti Gravity’ branding and, to either side of that, a white arrow, which lines up with one of four white lines.
- The section with ‘Anti Gravity’ on it will move, but to release it you must reach directly behind the arrow markings and release a cam on either side. This can either be done by reaching in from the top and pushing down, or from the bottom and pulling the red tag attached to each.
- You can then slide the attachment point up or down, line it up with the white lines to ensure it is even on both sides, and then release.
The best approach is to pad the bag out with some pillows and a bit of weight to make it representative. Next, set up the hip belt and get it comfortably on your hips, in such a way that it should be able to take almost all of the weight, with the shoulder straps just preventing the bag from falling backwards. Now, either with the help of a friend or with some trial and error, move the shoulder straps up or down until they rest comfortably on your shoulders.
Fine adjustments can, and very likely will, also be made during a hike by adjusting the various straps, which can help to redistribute weight and keep the pack comfortable, but getting the right basic setting is essential to begin with.
Atmos 65 comfort
Features, handy pockets and so on are all well and good but by far the biggest factor in choosing a backpack is the simple question; is it comfortable?
Well, even allowing for the fact that I generally have a fair weight of kit in it, the Atmos is almost unbelievably comfortable. The majority of the weight is carried on your hips, with the ability to adjust the weight to hips or shoulders over the course of the day. It feels, surprisingly, as if very little of the pack is actually resting against your body, with most of your back only in contact with the springy mesh, allowing for both comfort and airflow. This reduced chafing and overheating, although of course it’s hard to avoid your upper back and shoulders having a fair bit of direct contact with the back. Even in these places, the bag is well-padded and the shoulder-straps have a sort of three-dimensional mesh structure that also helps to create airflow and reduce direct pressure.
It’s impressive stuff, and having only recently done a hike in the far less well-designed Vango, the difference was extremely noticeable. This may not be the best pack for ultralight hiking but that’s missing the point – this is a great pack for when you are carrying a fair bit of weight, so comfort becomes especially important. That makes it perfect for people on trips of, perhaps, up to a week with reasonably traditional overnight kit and not a highly pared-down, ultralight set-up.
Use in practice – my experience
Layout
As mentioned above, there are plenty of pockets designed with real thought to how the bag will be used in practice. Plenty of compression straps, including one inside the bag that compresses the contents from the top, make it easy to keep everything balanced and even offer ways to hang clothes or a towel on the outside of the bag to dry while hiking. The top and bottom compartments are well-sized, giving sensible options to arrange kit so that it’s easily accessible without needing to pull everything out – essential when hiking in wet weather. And the stretchy panel on the back of the bag is just brilliant for quick management of kit on the go.
If I were to raise any criticisms it would be that the sheer number of compression straps can in fact make the outside of the pack a little messy, and if you are inclined to neatness you would probably want to at least fold and tape some of these so there aren’t quite so many stray bits of webbing flapping about. I also find the fact that the side zip compartments simply share space with the main body a little frustrating at times. It’s easy, for example, to fit a jetboil into one of those compartments as long as there is nothing in the way inside the main pack. But, some mornings you find the contents of the pack has shifted around a bit, or your bag of food has ended up in a different location, and suddenly you’re struggling to fit the jetboil into the side pouch. It’s a minor detail, and since the alternative is the rather ugly ‘rocket pouch’ style side-pouches that stick out from the main pack, I’d probably prefer it this way in any case.
The Atmos 65’s capacity
The 65l capacity is more than adequate for a 3-5 day hiking trip unless you’re operating in such extreme conditions that you need a lot more clothes, bulkier sleeping bags, etc. On the PCT, I had waterproofs, a down jacket, my Rab Alpine 600 sleeping bag, a jetboil, a tarp and bivvy bag, five days worth of food, and of course myriad other bits and pieces (my full kit list can be seen here) and there was never any danger of me not being able to fit things into the bag. Even on day 1, with all my food still uneaten, I had the top tightly cinched closed and wasn’t using the full capacity of the spindrift collar. By the end, I was using the compression straps to keep everything neat inside an increasingly roomy bag. Even had the weather been worse and I’d needed a couple of extra layers, or if I’d decided to use a lightweight tent instead of the tarp, it’s hard to imagine running out of space – food would realistically be the only limiting factor.
Suitability
For backpacking
The Atmos AG 65 would actually make for a decent all-purpose travel backpack. The comfort when carrying quite heavy loads, and the range of pockets, make it a decent bet for long journeys involving a lot of public transport. The main disadvantage is the lack of front-opening which makes it hard to easily get to all of your kit at once. That makes it a little less suitable to live out of when in hotels and hostels, for example, and if that was your main use-case I might be inclined to look at the Kestrel or one of the other bags with a wide zip opening.
It’s also worth bearing in mind that the Atmos 65 is too large to take as carry-on and, given the semi-rigid back, I think you’d struggle to squeeze it down to carry-on size even if it was half-full and you made use of all the compression straps. Of course, that shouldn’t be a surprise for a bag with this capacity, and would be the case for almost any other bag in this size range.
For hiking
Multi-day hikes of up to a week are really the sweet spot for the Atmos AG 65. The ability to comfortably carry quite heavy weight, the decent volume and the range of pouches make it perfect for hikes where you need to be able to carry significantly more than just a day’s worth of kit, but where trimming every gram isn’t necessarily a concern and you can tolerate a slightly heavier pack in exchange for comfort and ventilation.
For thru-hikes
Despite being very comfortable, it’s unlikely that the Atmos AG 65 is going to be seen as a serious option for thru-hiking. Even with the lid removed, it weighs more than twice as much as ultra-light options and that rapidly becomes a limiting factor when you’re considering carrying it day after day for weeks at a time, and when you’re doing your best to reduce weight in every other area of your kit.
That said, of course, plenty of people have done thru-hikes with far heavier packs than this and just because the trend is for thru-hikers to achieve speed and comfort through very low-weight, there’s no reason that someone couldn’t hike the PCT or the AT with the Atmos AG 65. They’d just have to be happy with the weight-for-comfort trade-off, and be very disciplined about not filling it to its full capacity…
Osprey Atmost 65: Final word
When you factor in the price, the capacity, and the flexibility to cope with a range of different activities, the Atmos AG 65 is a great purchase. It’s especially suitable for warmer climates or people concerned about comfort, but there’s really no scenario that it couldn’t be at least decent for – even if it’s not the perfect bag for every niche. Some people may find it over-engineered or too stuffed with features, and prefer simpler bags, but that is entirely a personal choice. It’s hard to imagine it ever being something you would regret having in your hiking cupboard, even if you subsequently build out your range of bags with ones that are lighter, simpler, smaller, larger, or whatever else.
Other Essential Outdoor Gear Reviews.
Thanks for dropping in and reading this Atmos AG 65 review. Whilst you’re here feel free to check some of our other posts including this must-read review of the Garmin Vivosmart HR+ and our side by side comparison of the Garmin InReach and SPOT navigation devices.